Today we’re going to save you some time and trouble by showing you how to set up user authentication on your application using Auth0!
In case you haven’t heard, Auth0 is an identity-as-a-service platform. You can use Auth0 to create a signup and login flow (among other functionalities) in your application without having to spend hours coding one from scratch! This is especially useful at hackathons where, unlike your project teammates, time is not on your side.
Getting Started!
Now that you’ve heard all about it, I’m sure you’re itching to get started! Simply head over to the Auth0 website and follow the instructions. Once you’ve input your account information, Auth0 will set up a user tenant for you. This is simply a URL that will be exclusive to your account.
Once you’re logged in, you’ll be able to see a complete overview of your entire account. Feel free to explore everything Auth0 has to offer! When you’re done, we can go ahead and start working on one of the many sample applications offered for free!
Click on the applications tab on the left-hand side, and then click the Create Application button on the right-hand side of the page. For this walk-through, I’ll be using the default “My App” application name and selecting a Single Page Web Application since I’m most familiar with JavaScript!
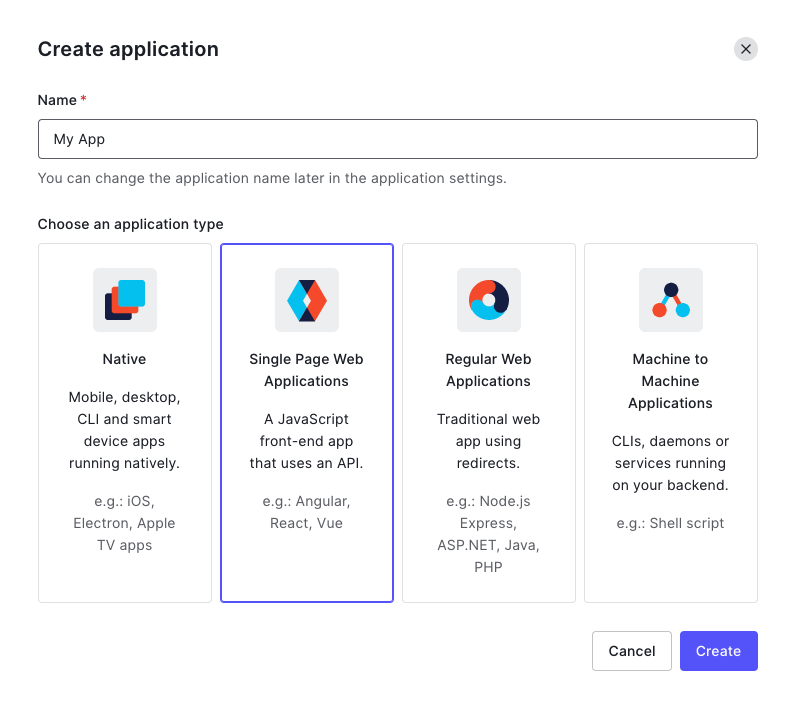
Go ahead and click “Create.” From there, you’ll be taken to the Quick Start tab and asked to select a specific technology for your web app. Once again, I chose JavaScript here but feel free to select one of the frameworks made available like Vue or React. For the purposes of this brief walk-through, I’ll be creating a Single Page Application (SPA).
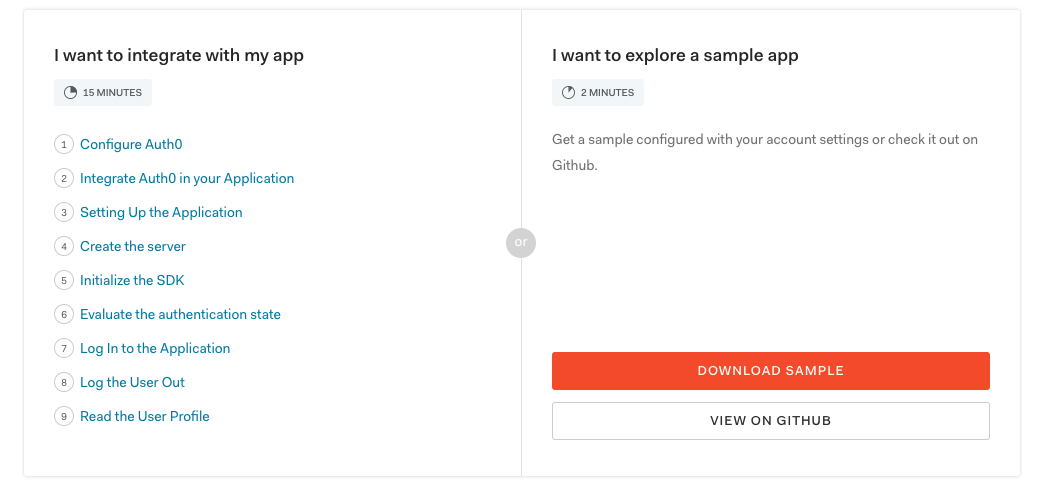
Now you have two options. On the left-hand side of the tutorial page, you can either work through building out the sample application step by step or you can explore the sample app. Alternatively, you can view the source code for these samples at the Auth0 GitHub repository.
If you want to dive a little deeper and see how the code is actually implemented, use the “I want to integrate with my app” option shown above.
Setting up your Sample Application
For the sake of this demonstration, I’ve gone ahead and downloaded the sample application directly from the Auth0 website. From there, you’ll be provided with some instructions on how to set up your application settings for local use. Go ahead and follow the workflow illustrated in the images below and remember to save your settings! The advantage of simply downloading the sample application is that it pre-sets your account information for you.

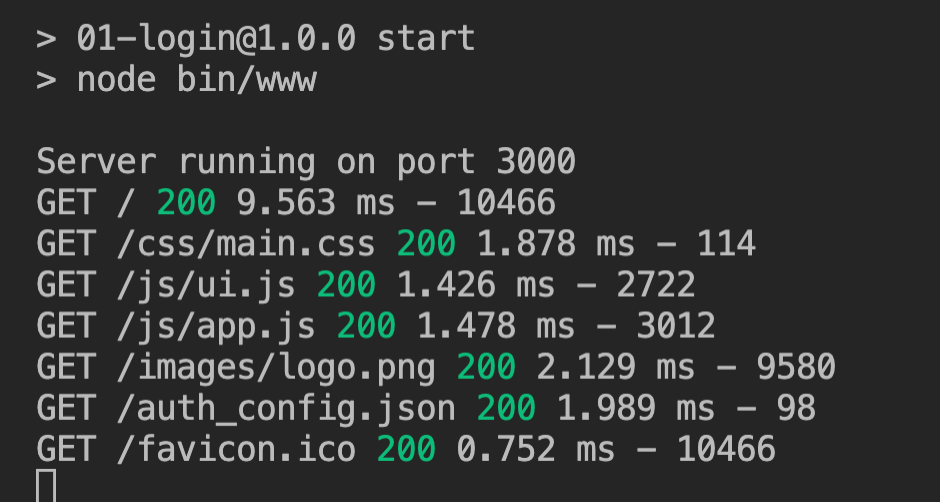
Now that I’ve got my Auth0 application configured, I moved the downloaded sample application file onto my desktop, renamed it Auth0_Sample and opened it up in my VSCode text editor. From here, I just followed the instructions provided by running the following command in my terminal and then launched https://localhost:3000 in my browser!
npm install && npm run
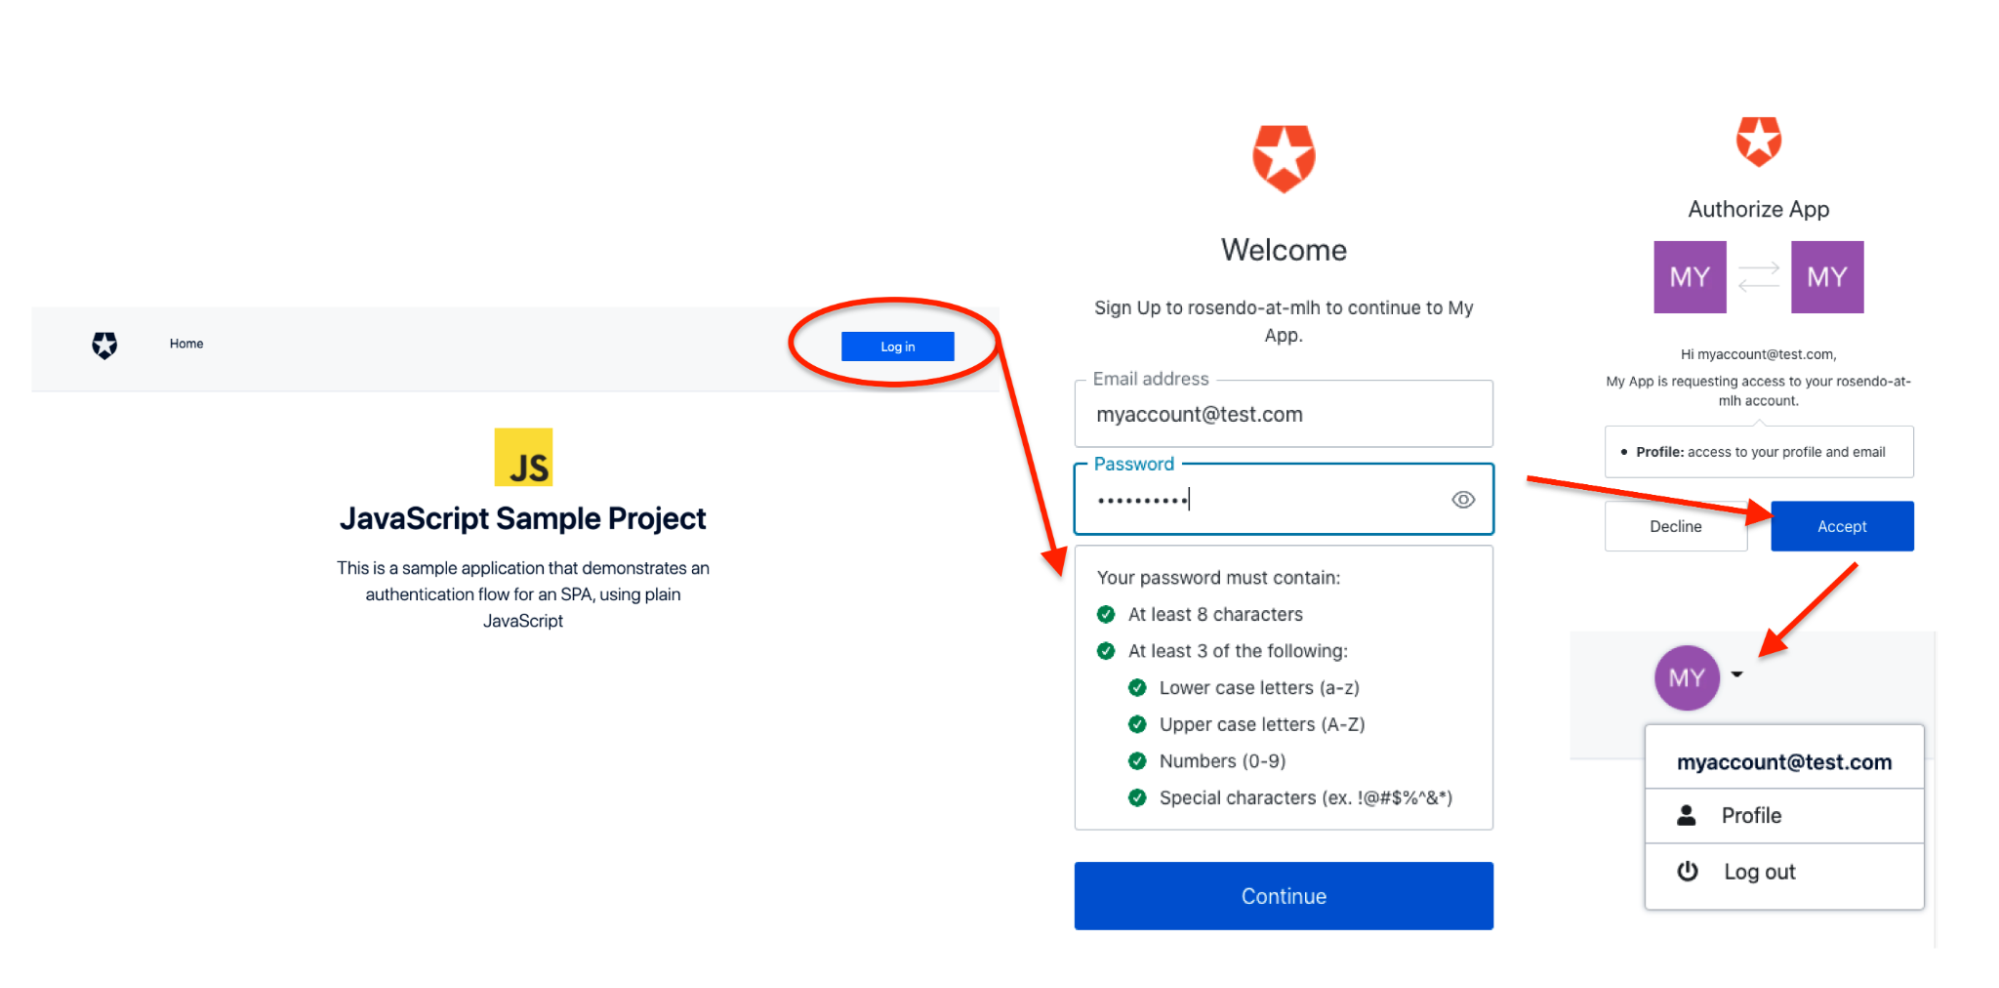
Awesome, now you can hit the log-in button and sign up for a new account! Check it out below:
Managing Users
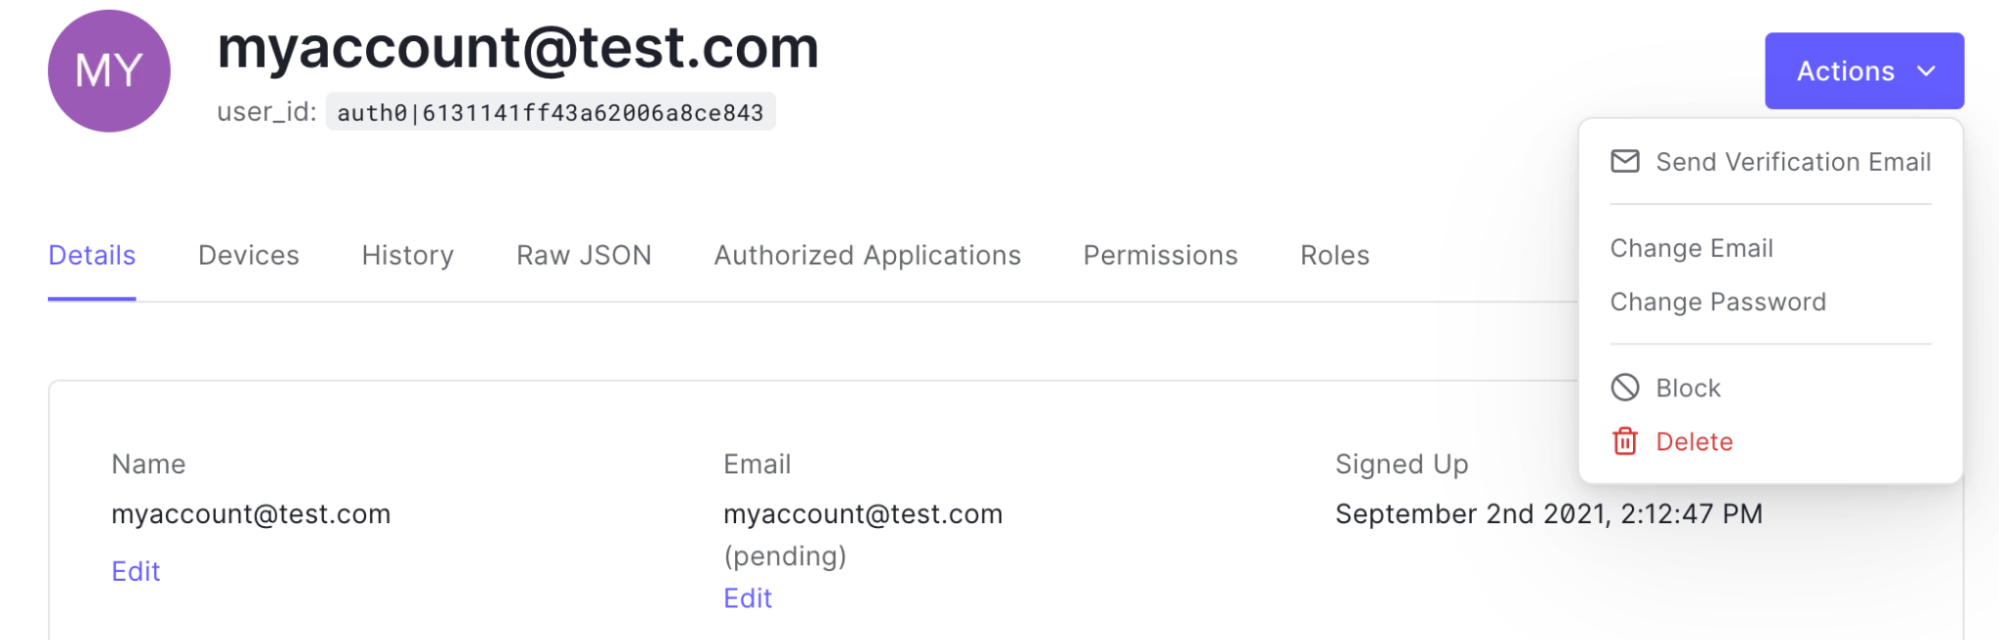
Now that you’ve got your first application user signed up, we can manage that user. Head over to your Auth0 panel and click on User Management > Users.
From here, you’ll be able to send a verification email to the email address used, change the email address, change the password, block or delete the user! All functionalities that would have taken you hours to build out are available after minutes worth of setup.
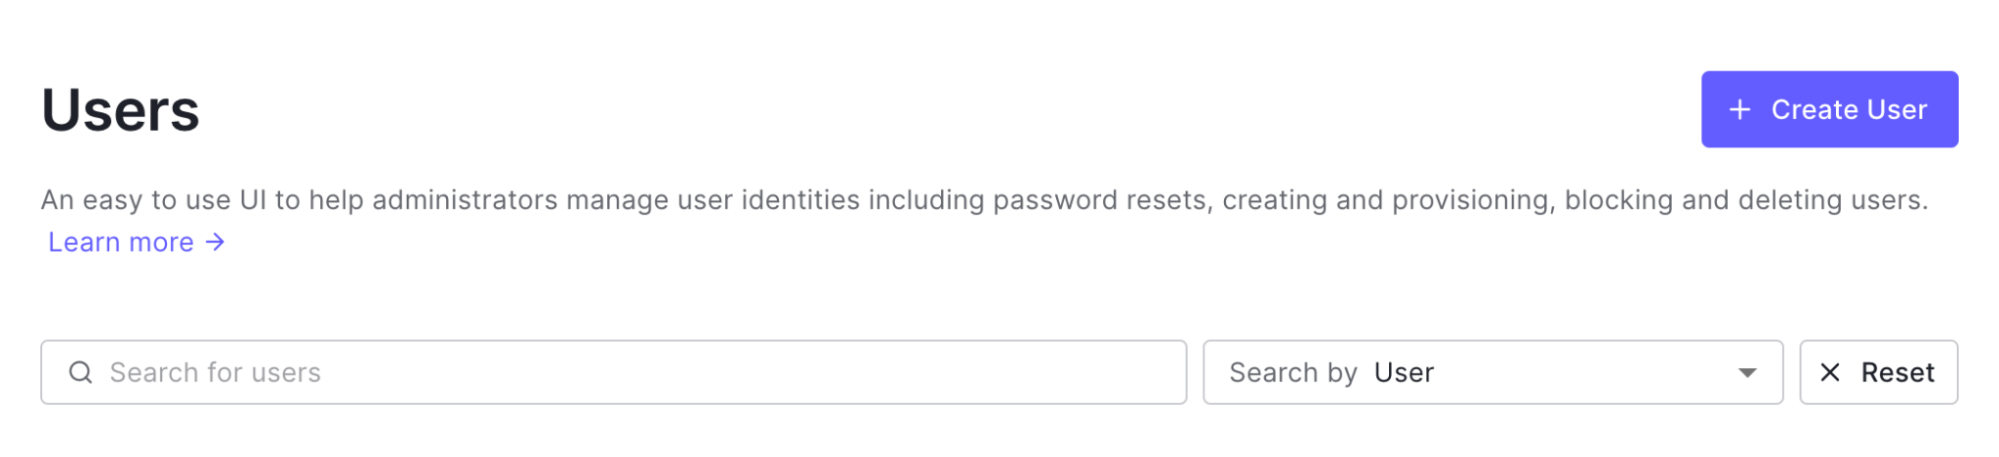
You can also create new users from this panel and assign customized roles to you and your teammates. These are based on the Auth0 APIs your application is leveraging and the APIs you want each role to have access to. Feel free to explore those features on your own!
Customizing Your Sample Application
 While having a working example of an Auth0-enabled application is great, it’s always helpful to see how some of the functionality works so that you can better understand how to customize Auth0 for your specific application.
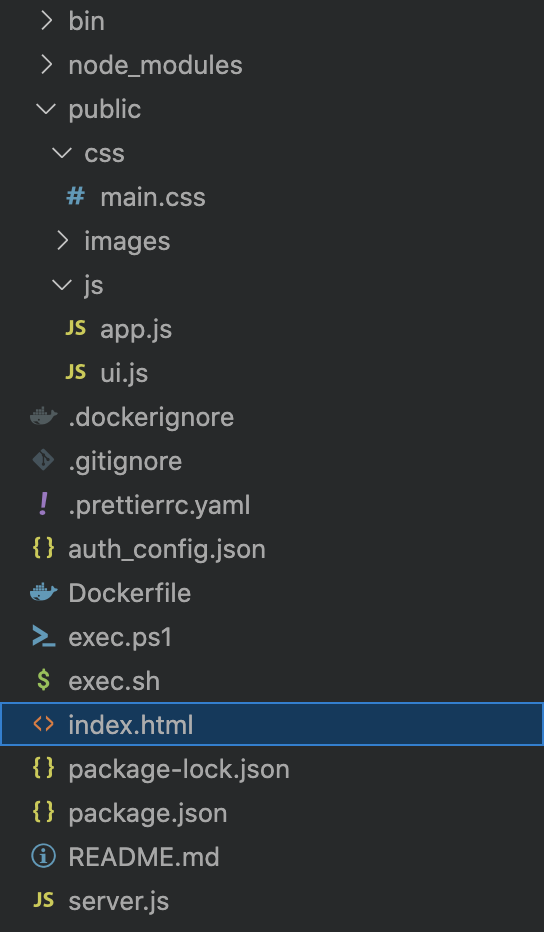
Now the first thing we should do is take a look at the application file structure. Let’s head back to VS Code and take a look at what the sample application actually looks like.
In the image, you’ll see that there are several files and folders. For now, we’re going to focus on the index.html file and, within the public folder, the main.css and ui.js files.
Let’s open up the main.css file and start making some changes.
At the bottom of the page, we’re going to create a new id called #user-logged-in. Feel free to use the code sample below:
#user-logged-in {
color: red;
}
Whatever HTML element we apply this id to will now display red text.
From here, let’s head over to our index.html file and add a new element.
Scroll down to line 172. Just below the “JavaScript Sample Project” heading, add a new paragraph element and apply the id we just made. Include the word TEST between the opening and closing element tags.
<p id=“user-logged-in”>TEST</p>
If you did everything correctly, your sample project should look like this:

Now that we know our content displays correctly, let’s add a class to the paragraph element that makes it disappear. This is going to come in handy later and fortunately, our sample application already has a class written into the main.css file called “hidden.” This class will automatically apply the “display: none” attribute to our paragraph element.
<p id=”user-logged-in” class=”hidden”>TEST</p>
The red TEST text should no longer display!
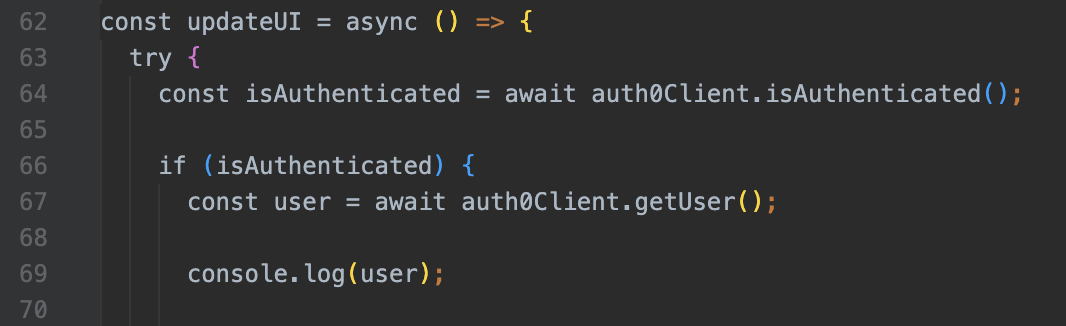
Now we’re going to make it so that we can display some user information upon log-in. Go to the ui.js file and look for a function called updateUI. This function checks whether a logged-in user is authenticated or not. If the user is authenticated, then updateUI grabs the user information from Auth0 and stores it in a variable called user.
What we want to do is find out what the user object actually contains. In order to do this, let’s console.log the user object right after the variable declaration on line 67.
Now let’s check out the browser window where our sample application is running, open the inspect tool and toggle over to the console tab. When we log-in with user credentials, we should see the following object appear in our console, showing us everything that the user object from Auth0 currently contains.
 As you can see, the user object contains something called a nickname. Depending on the account you used to sign up this information will obviously vary.
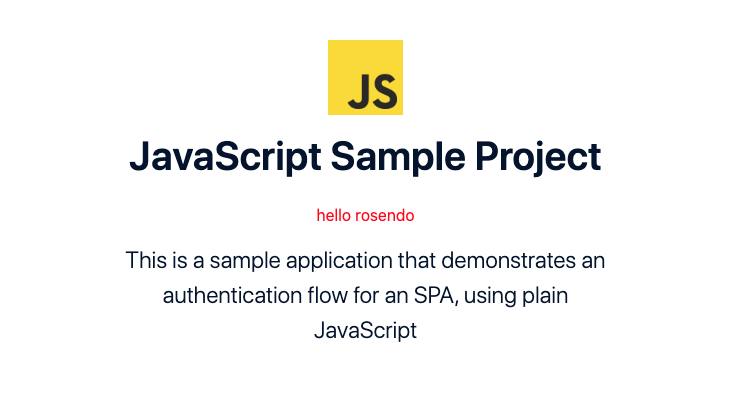
For the purposes of this demo, I’m going to grab the nickname key-value pair from the user object and have it display when a user logs in. So instead of TEST in red letters, we’ll see the word hello + the user’s nickname, or in this case Rosendo.
So now that we’ve confirmed what the user object contains, we can delete our console log statement and replace it with some actual code.
Remember the CSS id we created earlier (#user-logged-in)? Well, now we’re going to use it to create a new variable in our code called displayUser. We are then going to set the inner text to display our message plus the user nickname and FINALLY, we’re going to remove the hidden class so that the text displays on our sample application. Just below line 67 in the ui.js file, add the following code:
let displayUser = document.getElementById(“user-logged-in”);
displayUser.innerText = “hello “ + user.nickname;
displayUser.classList.remove(“hidden”);
When we check our browser, we should see our user message displayed where the TEST text used to be!
Try signing into the application with a new user and see how the nickname being displayed changes!
Now that you know how to customize this sample application, you can take the existing code and refactor it in a way that suits your needs. This could range from stripping down the index.html file to include personalized elements, adding new css rules and classes to style the page to your liking, and of course, adding new functionality using JavaScript.
Additional Resources
You should have a pretty solid high-level understanding of how to get started with Auth0. You’ll be able to integrate Auth0 functionalities through your single-page web application using JavaScript, through the command line, IoT devices, and through a standard full-stack web application using Java, Node, .NET, PHP & more. Once you sign up for a free Auth0 account, you’ll have access to dozens of well-documented walk-throughs and tutorials.
To save you some time, I’ve compiled some of their additional developer resources below:
- https://hackp.ac/auth0-dev-center
- https://hackp.ac/auth0-quickstart
- https://hackp.ac/auth0-docs
- https://hackp.ac/auth0-support
If you want to put your Auth0 skills to the test, submit to the Best Use of Auth0 prize category at your next MLH hackathon. To learn more, visit the MLH website!