Want to write your first Web3 program in just a matter of minutes? Hedera is a great way to get started! Hedera is a proof-of-stake public blockchain network. The Hedera network doesn’t rely on miners to create new blocks on the blockchain (like a proof-of-work network would) but instead relies on validators staking their tokens in order to secure and record their network transactions.
In blockchain lingo, this form of validation is typically referred to as consensus. Hedera uses something they call hashgraph consensus, which is meant to achieve the highest-grade of security possible, blazing-fast transaction speeds, and incredibly low energy consumption – making them the greenest proof of stake network around.
As far as building on the Hedera network, there are a ton of things you can do using Hedera’s Hashgraph SDK. For instance, if you have an application that requires reads and writes to a database, the backend can effectively be configured to use Hedera instead.
A great thing about Hedera is that it’s totally free to get started. All you need is an account and a little programming experience. There’s no need to learn a brand new programming language since they have SDKs that leverage JavaScript, Java, Swift, and Go!
In this blog post, we will show you how to use the JavaScript Hashgraph SDK to do some basic transactions on the blockchain.
Let’s dive in!
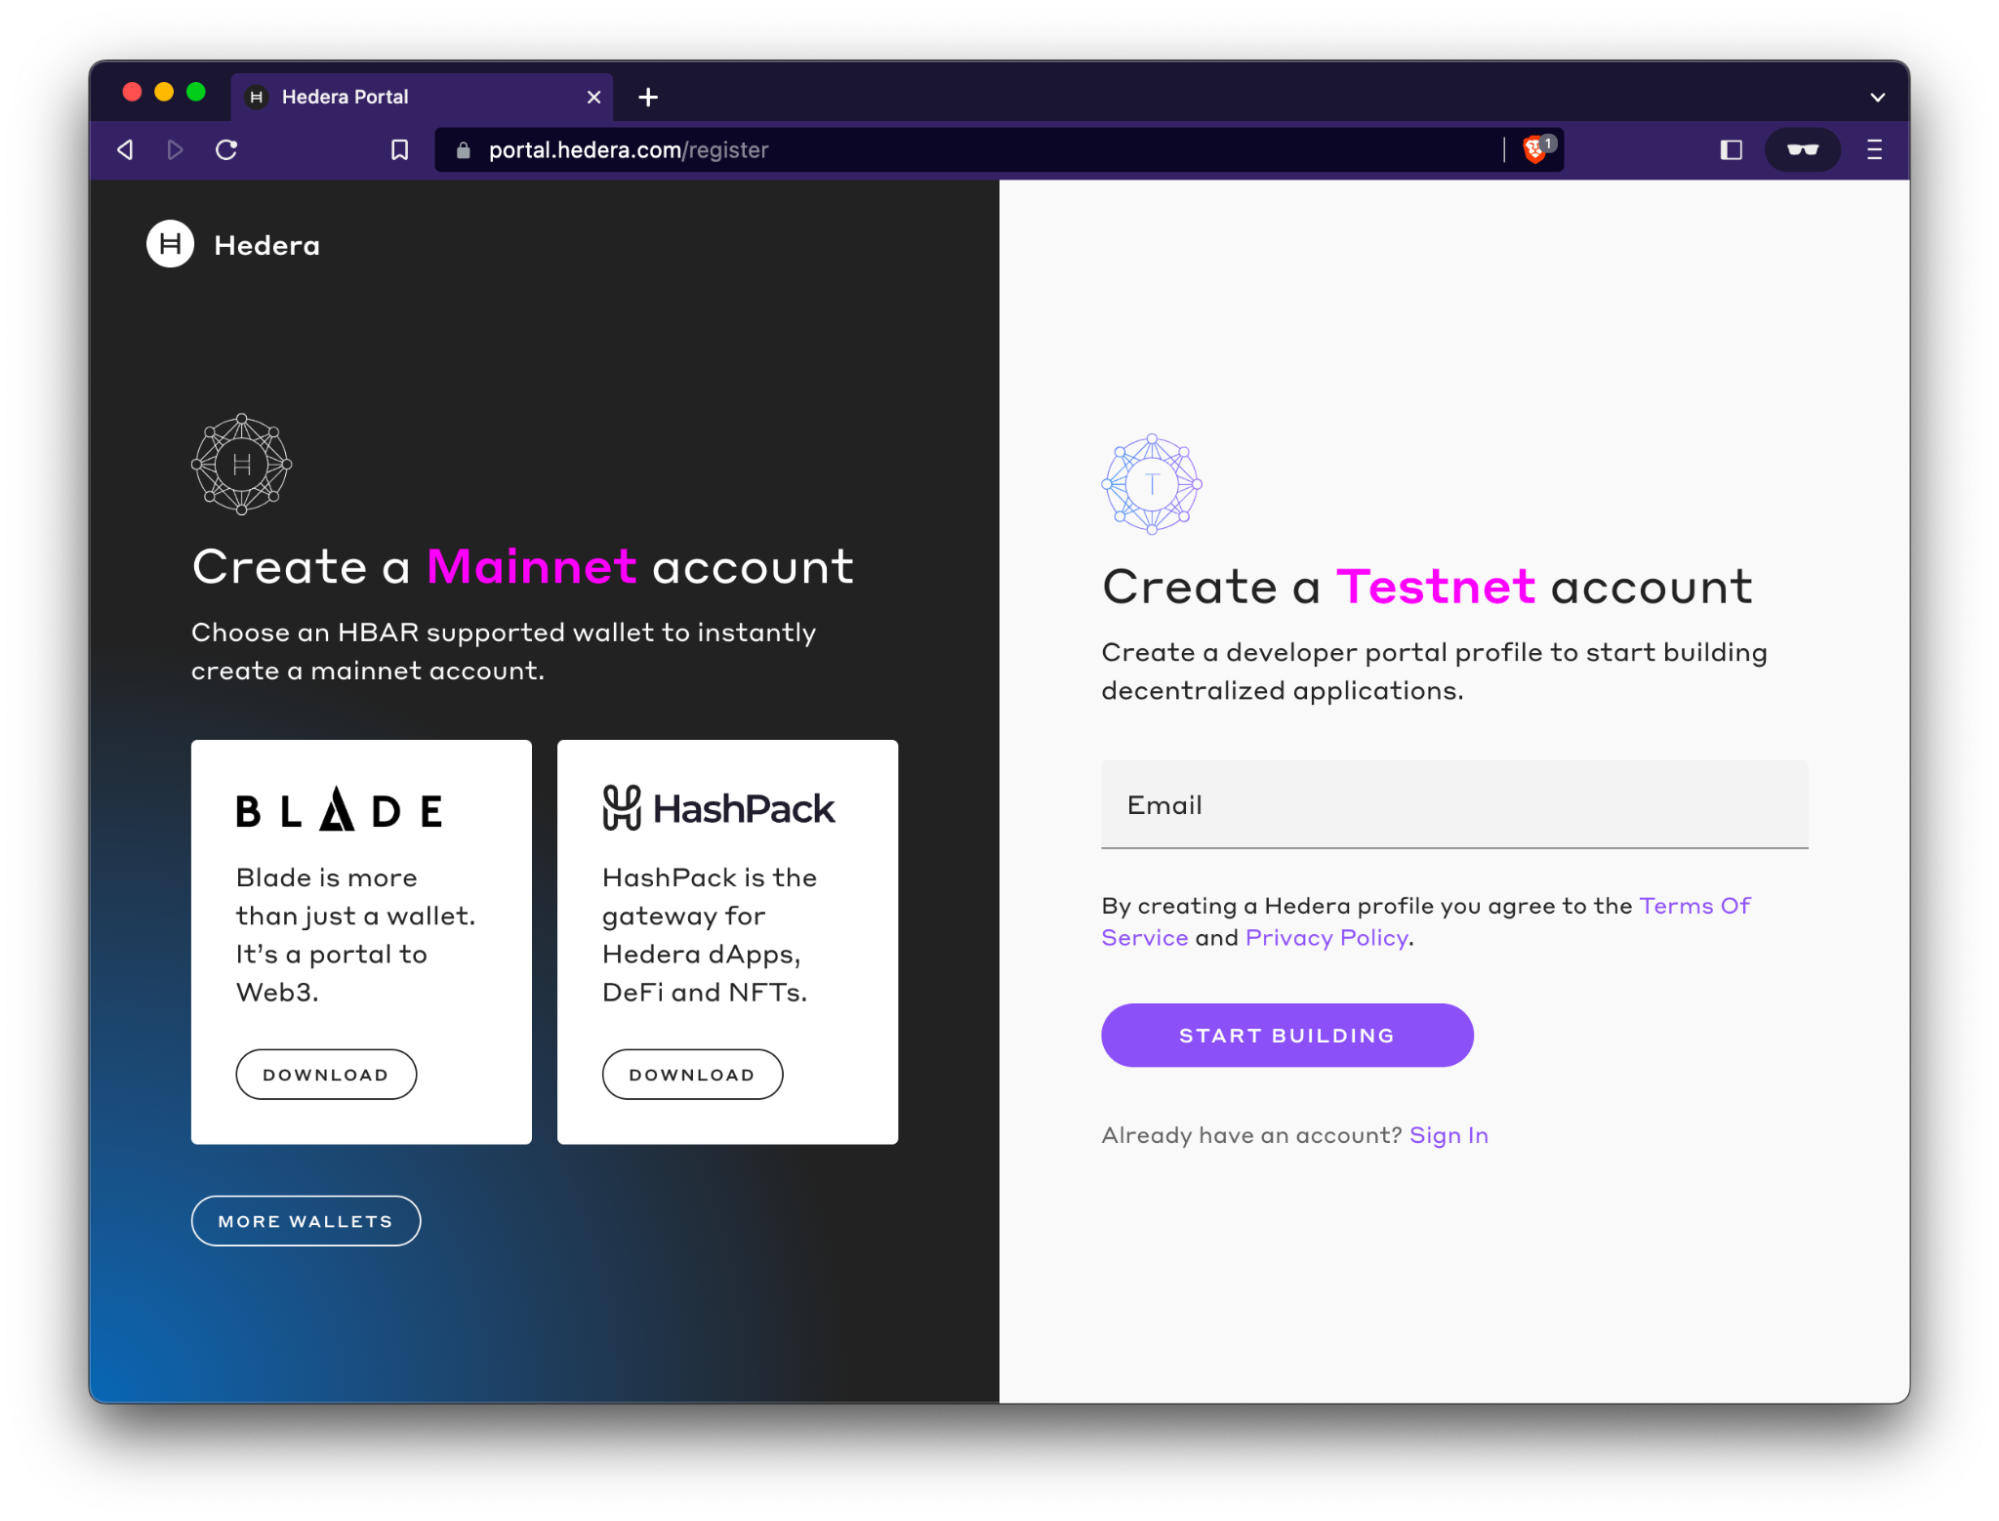
Head over to the Hedera website to sign up for a free developer account on the Hedera Testnet!
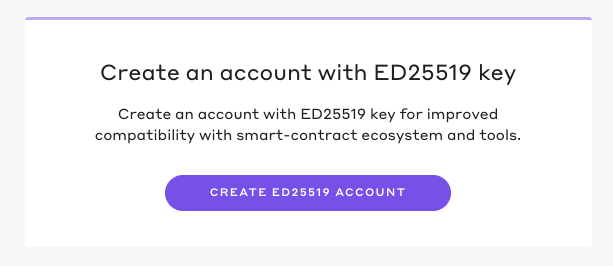
Once you’ve verified your account, you’ll be directed to a dashboard and given the option to generate an ED25519 key. As you can see, this will give your account improved compatibility with Hedera’s network. Go ahead and hit the ‘Create ED25519 Account’ button.
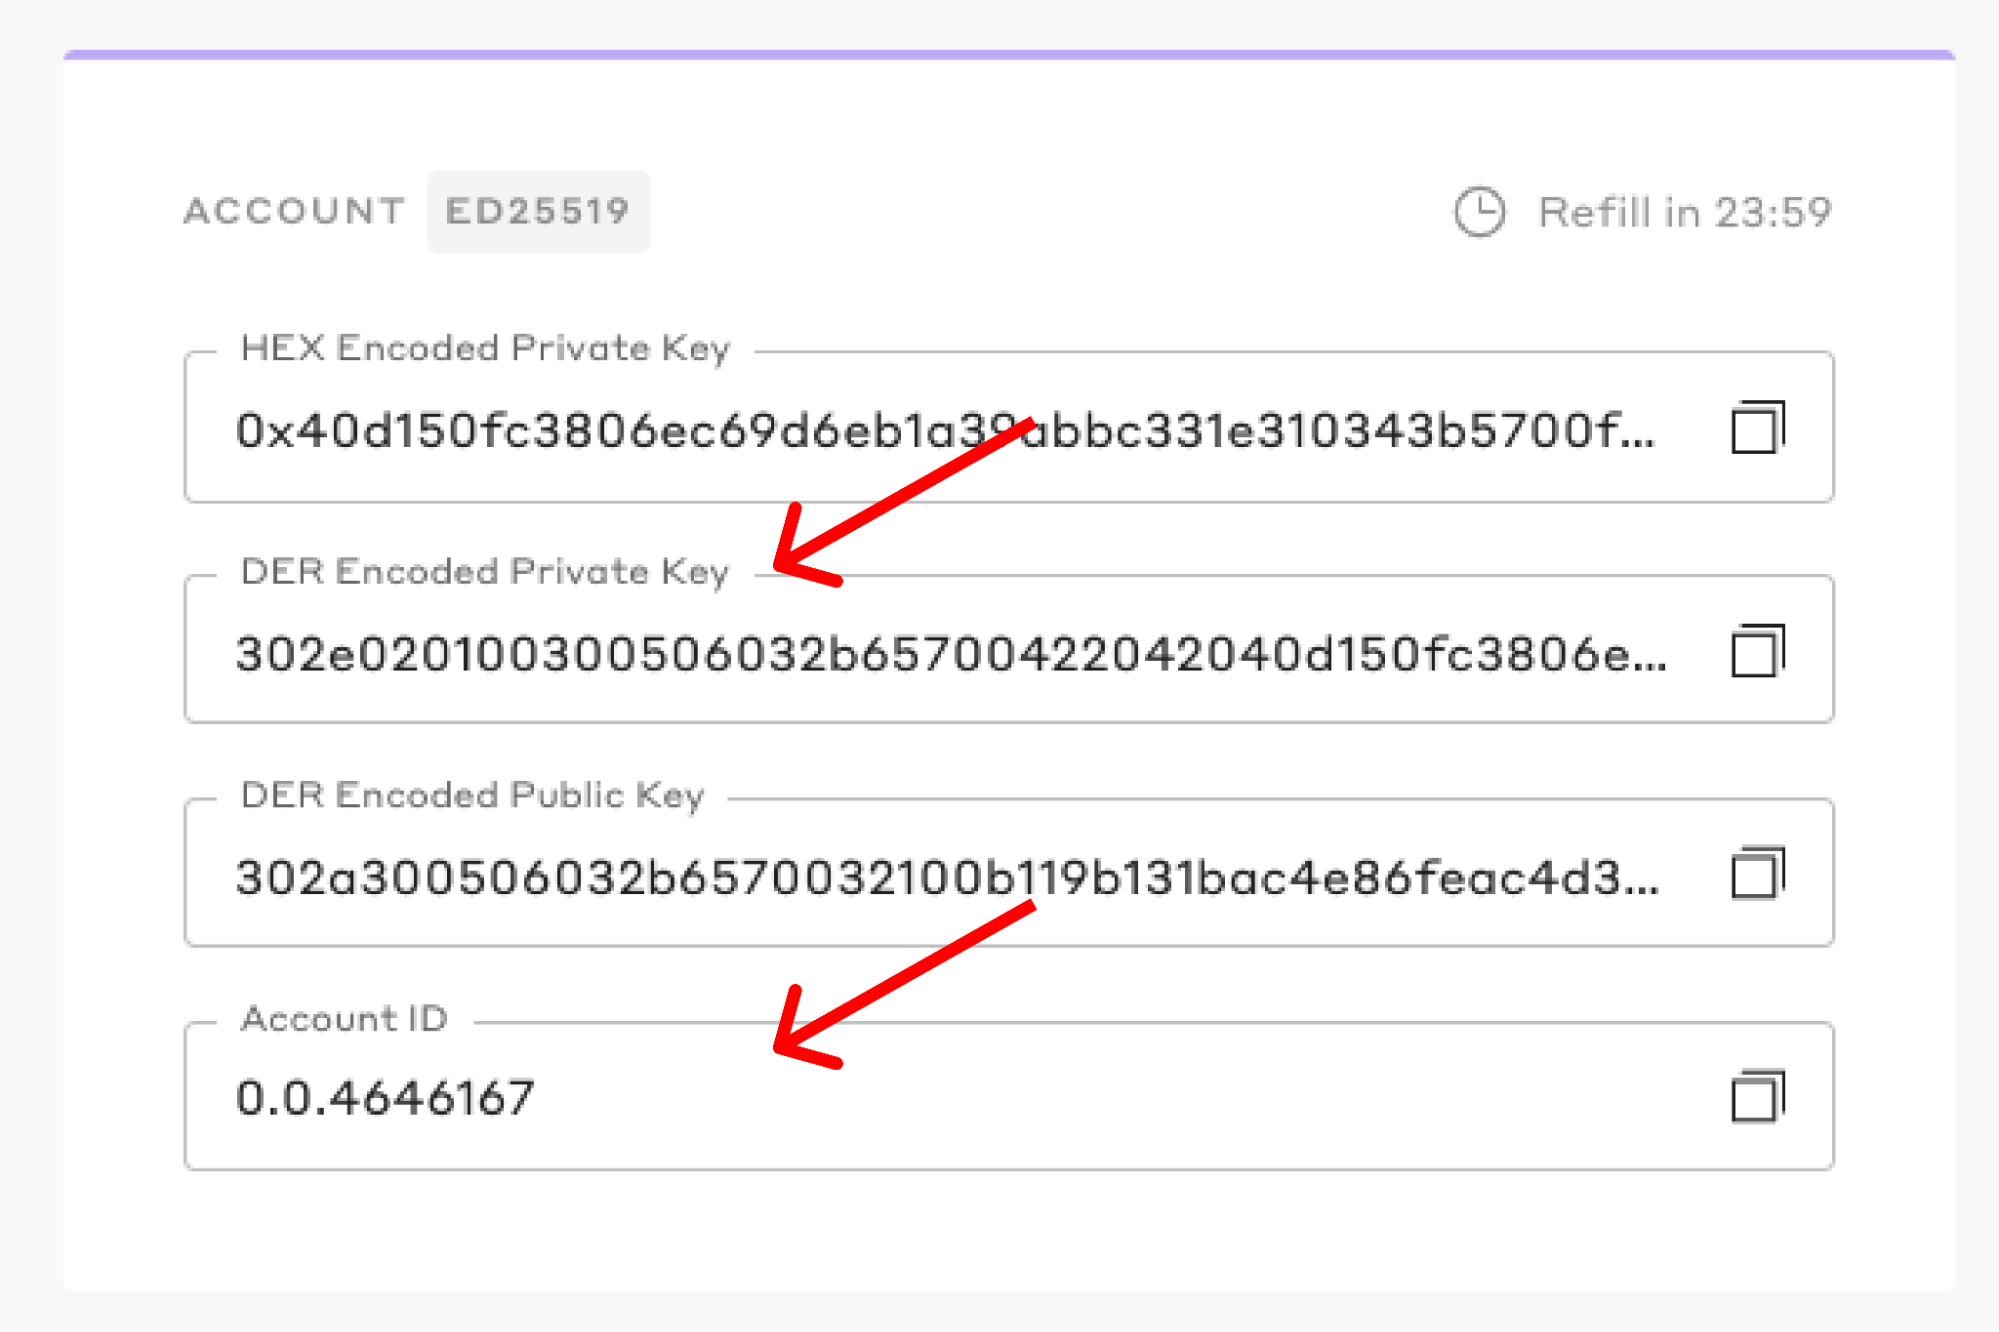
You’ll see some account information populate on your dashboard. You’ll need the DER Encoded Private Key and the Account ID to get your environment set up!
Setting up Your Environment
Let’s create a project directory for all the code we’ll be writing. Let’s open up a terminal window to get started.
cd ./desktop

mkdir hello-hedera-js-sdk && cd hello-hedera-js-sdk
Initialize a node.js project in this new directory by running the following command:
npm init -yThis is what your terminal window should read after running the command:
{
  "name": "hello-hedera-js-sdk",
  "version": "",
  "description": "",
  "main": "index.js",
  "scripts": {
    "test": "echo \"Error: no test specified\" && exit 1"
  },
  "author": "",
  "license": "ISC"
}
Next, we’re going to install the JavaScript SDK, the dotenv dependency, and create index.js & .env files.
If you’re wondering what dotenv is, it’s an NPM package that allows us to create environment variables within our project. We can reference these variables in our code so that we’re not hard-coding our account information into any of our project files. This comes in handy when we’re pushing code to a public GitHub repository and allows us to hide our sensitive information.
npm install --save @hashgraph/sdk
npm install dotenv
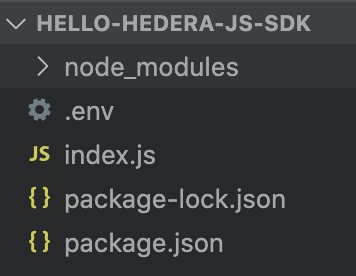
touch index.js .envIf you haven’t yet, go ahead and open up our project in a text editor (I’m using VS Code) to take a look at our project structure. It should look something like this:
Setting up Your .env File
Next, let’s create those environment variables I was talking about earlier. Click into your .env file and plug in the following code:
MY_ACCOUNT_ID=ENTER TESTNET ACCOUNT ID
MY_PRIVATE_KEY=DER ENCODED PRIVATE KEY
Note: when you’re plugging in your Account ID and your DER Encoded Private Key, don’t leave any spaces or use any quotation marks
Testing Your Environment Variables
Now let’s test out those environment variables using some JavaScript. Head over to your index.js file and plug in the following code:
   //Imports the dotenv dependency and environment variables into your index.js file

require("dotenv").config();

   //Imports the hashgraph/sdk dependency along with some built in functionality that will be used later on in the tutorial

const { Client, PrivateKey, AccountCreateTransaction, AccountBalanceQuery, Hbar, TransferTransaction } = require("@hashgraph/sdk");

   //Important to note that you have to write async functions when leveraging the Hedera network

async function main() {

    //Grabs your Hedera testnet account ID and private key from your .env file and stores them to new variables

    const myAccountId = process.env.MY_ACCOUNT_ID;
    const myPrivateKey = process.env.MY_PRIVATE_KEY;

    // If we weren't able to grab it, we should throw a new error, otherwise you should see a "Success!" message

    if (!myAccountId || !myPrivateKey) {
        throw new Error("Environment variables MY_ACCOUNT_ID and MY_PRIVATE_KEY must be present");
    } else {
        console.log("Success!");
    }
}
    //Remember to invoke your function!

main();
I’ve commented out each line to help explain what everything does. Once you’ve gotten all that code into your index.js file, you can go ahead and run the program.
node index.jsYour console should read “Success!” If it doesn’t, you may have configured your .env file incorrectly! Double check that you’ve followed all of the steps accurately.
Now that our .env file is up and running, let’s go ahead and set up a new Hedera Test client. This is going to be a new connection to the Hedera Test Network that leverages your account credentials. You can delete the IF statement from your original code and replace it with the following:
// Create our connection to the Hedera network

const client = Client.forTestnet();

// Sets your account credentials as the owner of the connection

client.setOperator(myAccountId, myPrivateKey);
This will establish your connection with the Hedera Network! Now let’s start testing out some concepts by adding some more functionality to our program.
Programmatically Create a New Account
Now that we have an established connection with the Hedera Test Network, let’s create a new account that we can interact with. You can do this programmatically with the following code:
//Create new keys

    const newAccountPrivateKey = PrivateKey.generateED25519();
    const newAccountPublicKey = newAccountPrivateKey.publicKey;
Remember the original ‘require’ statement we wrote at the beginning of this tutorial? One of the imported functionalities we are leveraging here is the AccountCreateTransaction functionality that comes from the Hashgraph SDK! So far we’ve created some new keys for that account. Now we’re going to create the actual account with a starting balance of 1,000 tinybar (a converted version of the Hedera currency, hbar.)
For your reference, 1 tinybar = 1E-8hbar or 1/100 millionths of an hbar. You can reference the Hedera docs to find all the HBAR denominations and abbreviations.
//Create a new account with 1,000 tinybar starting balance

    const newAccount = await new AccountCreateTransaction()
    .setKey(newAccountPublicKey)
    .setInitialBalance(Hbar.fromTinybars(1000))
    .execute(client);
Now before we run that code, let’s go ahead and write some code that allows us to read the new account ID from the blockchain.
// Get the new account ID

    const getReceipt = await newAccount.getReceipt(client);
    const newAccountId = getReceipt.accountId;

//Log the account ID

    console.log("The new account ID is: " + newAccountId);
Take note that, if you run this program multiple times, it will generate a new account ID every time.
Now that we’ve written the code to create a new account, we’ll need to leverage AccountBalanceQuery functionality of the Hashgraph SDK in order to confirm that we created it with 1000 tinybar as well.
//Verify the account balance

    const accountBalance = await new AccountBalanceQuery()
     .setAccountId(newAccountId)
     .execute(client);

    console.log("The new account balance is: "   +accountBalance.hbars.toTinybars() +" tinybar.");
Go ahead and run the node index.js command in your terminal. Your output should look something like this:
The new account ID is: 0.0.4615156
The new account balance is: 1000 tinybar.
Congratulations! You’ve just created a new account and transferred funds into it using the Hedera Hashgraph SDK! Next, let’s transfer some tinybar from one account to another!
Transferring Funds
Transferring hbar from one account to another is a basic transaction that you can integrate into your Hedera powered application to handle payments using cryptocurrency. We’ll be using the TransferTransaction functionality of the Hashgraph SDK.
Let’s go ahead and add the following code right beneath our last console.log statement.
//Create the transfer transaction. Remember that you need to specify the sending and receiving accounts in your code. Here we are referencing myAccountId and newAccountId respectively

const sendHbar = await new TransferTransaction()
.addHbarTransfer(myAccountId, Hbar.fromTinybars(-1000)) //Sending account
.addHbarTransfer(newAccountId, Hbar.fromTinybars(1000)) //Receiving account
.execute(client);
Remember, the myAccountID is our starting account. We’ll be transferring 1000 tinybar over to a new programmatically generated account. Since we start that account off with 1000 tinybar to begin with, the ending balance should be 2000 tinybar.
In order to confirm this we’ll need to write some additional code that reads the results of our transaction from the blockchain.
//Verify the transaction reached consensus

const transactionReceipt = await sendHbar.getReceipt(client);
console.log("The transfer transaction from my account to the new account was: " + transactionReceipt.status.toString());
The code above will tell us whether our transaction was successful or not. Now all we need to do is write some code that verifies the new balance of the receiving account and we’ll have all of the confirmation that we need.
//Check the new account's balance

const getNewBalance = await new AccountBalanceQuery()
     .setAccountId(newAccountId)
     .execute(client);

console.log("The account balance after the transfer is: " +getNewBalance.hbars.toTinybars() +" tinybar.")
Run the program again using the node index.js command in your terminal.
Remember, we generate a new account ID every time we run this program so your new account ID will continue to change unless you hardcode it into your program.
Your output should look like the following:
The new account ID is: 0.0.4615157
The new account balance is: 1000 tinybar.
The transfer transaction from my account to the new account was: SUCCESS
The account balance after the transfer is: 2000 tinybar.
Awesome! You just made your first successful tinybar transfer between accounts using the Hedera network.
What’s next?
You now have everything you need to get started with building your very own Web3 application using the Hedera blockchain network! If you want to take a closer look at this tutorial, head over to the Hedera website.
To learn more about what you can accomplish using the Hedera network, check out these resources!
If you want to put your Hedera skills to the test be sure to submit to the Best Use of Hedera prize category at your next MLH hackathon.