In November 2015, Nick Aversano and I launched an Internet of Things art hack event for Technica, the all ladies hackathon at University of Maryland. In the face of adversity and an incredibly tight deadline, we successfully created a splatter painting using a drone controlled by participants from around the world. The bulk of the work came down to the week of Technica. Nick and I basically gave up on all of our academics and other responsibilities to work 24/7 on this project. Within a week I learned everything I could about drones and five new programming languages. Here’s how we did it.
T-4 Days until Technica
When flying large distances outdoors, GPS is a great method for navigating to a specific location. In our case, we would be flying indoors within a 10×15 square foot space and wanted accuracy to 1 foot. It couldn’t be done. After all, you wouldn’t use GPS to navigate rooms in your house. This meant we had to develop our own navigation system for the drone to use. We were unsure of how to fly a drone to precise coordinates indoors; however, we were at a university with tons of resources so, if we couldn’t figure it out, we probably would be able to find someone who could.
So, Nick and I knocked on every door in the aerospace engineering department. No luck. Dejected, we dragged ourselves back to Startup Shell, our incubator and home base for the project.
As we sat and discussed alternative methods to GPS locating, a nearby Startup Shell member, Josh Taylor, said, “Well, there is OpenCV fiduciary tracking…” It clicked for Nick, but I was completely lost. He pointed us to a photo of Valve’s virtual reality head-mounted display demonstration at Steam Dev Days.
They used simple data matrices for position tracking by a camera mounted on the head piece. It made sense; as long as we know the location of each unique identifier along a wall, the altitude of the drone, and the real and perceived dimensions of each identifier matrix, we could calculate the drone’s distance from the wall.
We decided to try it out using a webcam. I created a couple simple 3×3 QR-codes on Photoshop while Nick and Josh worked to get OpenCV working.
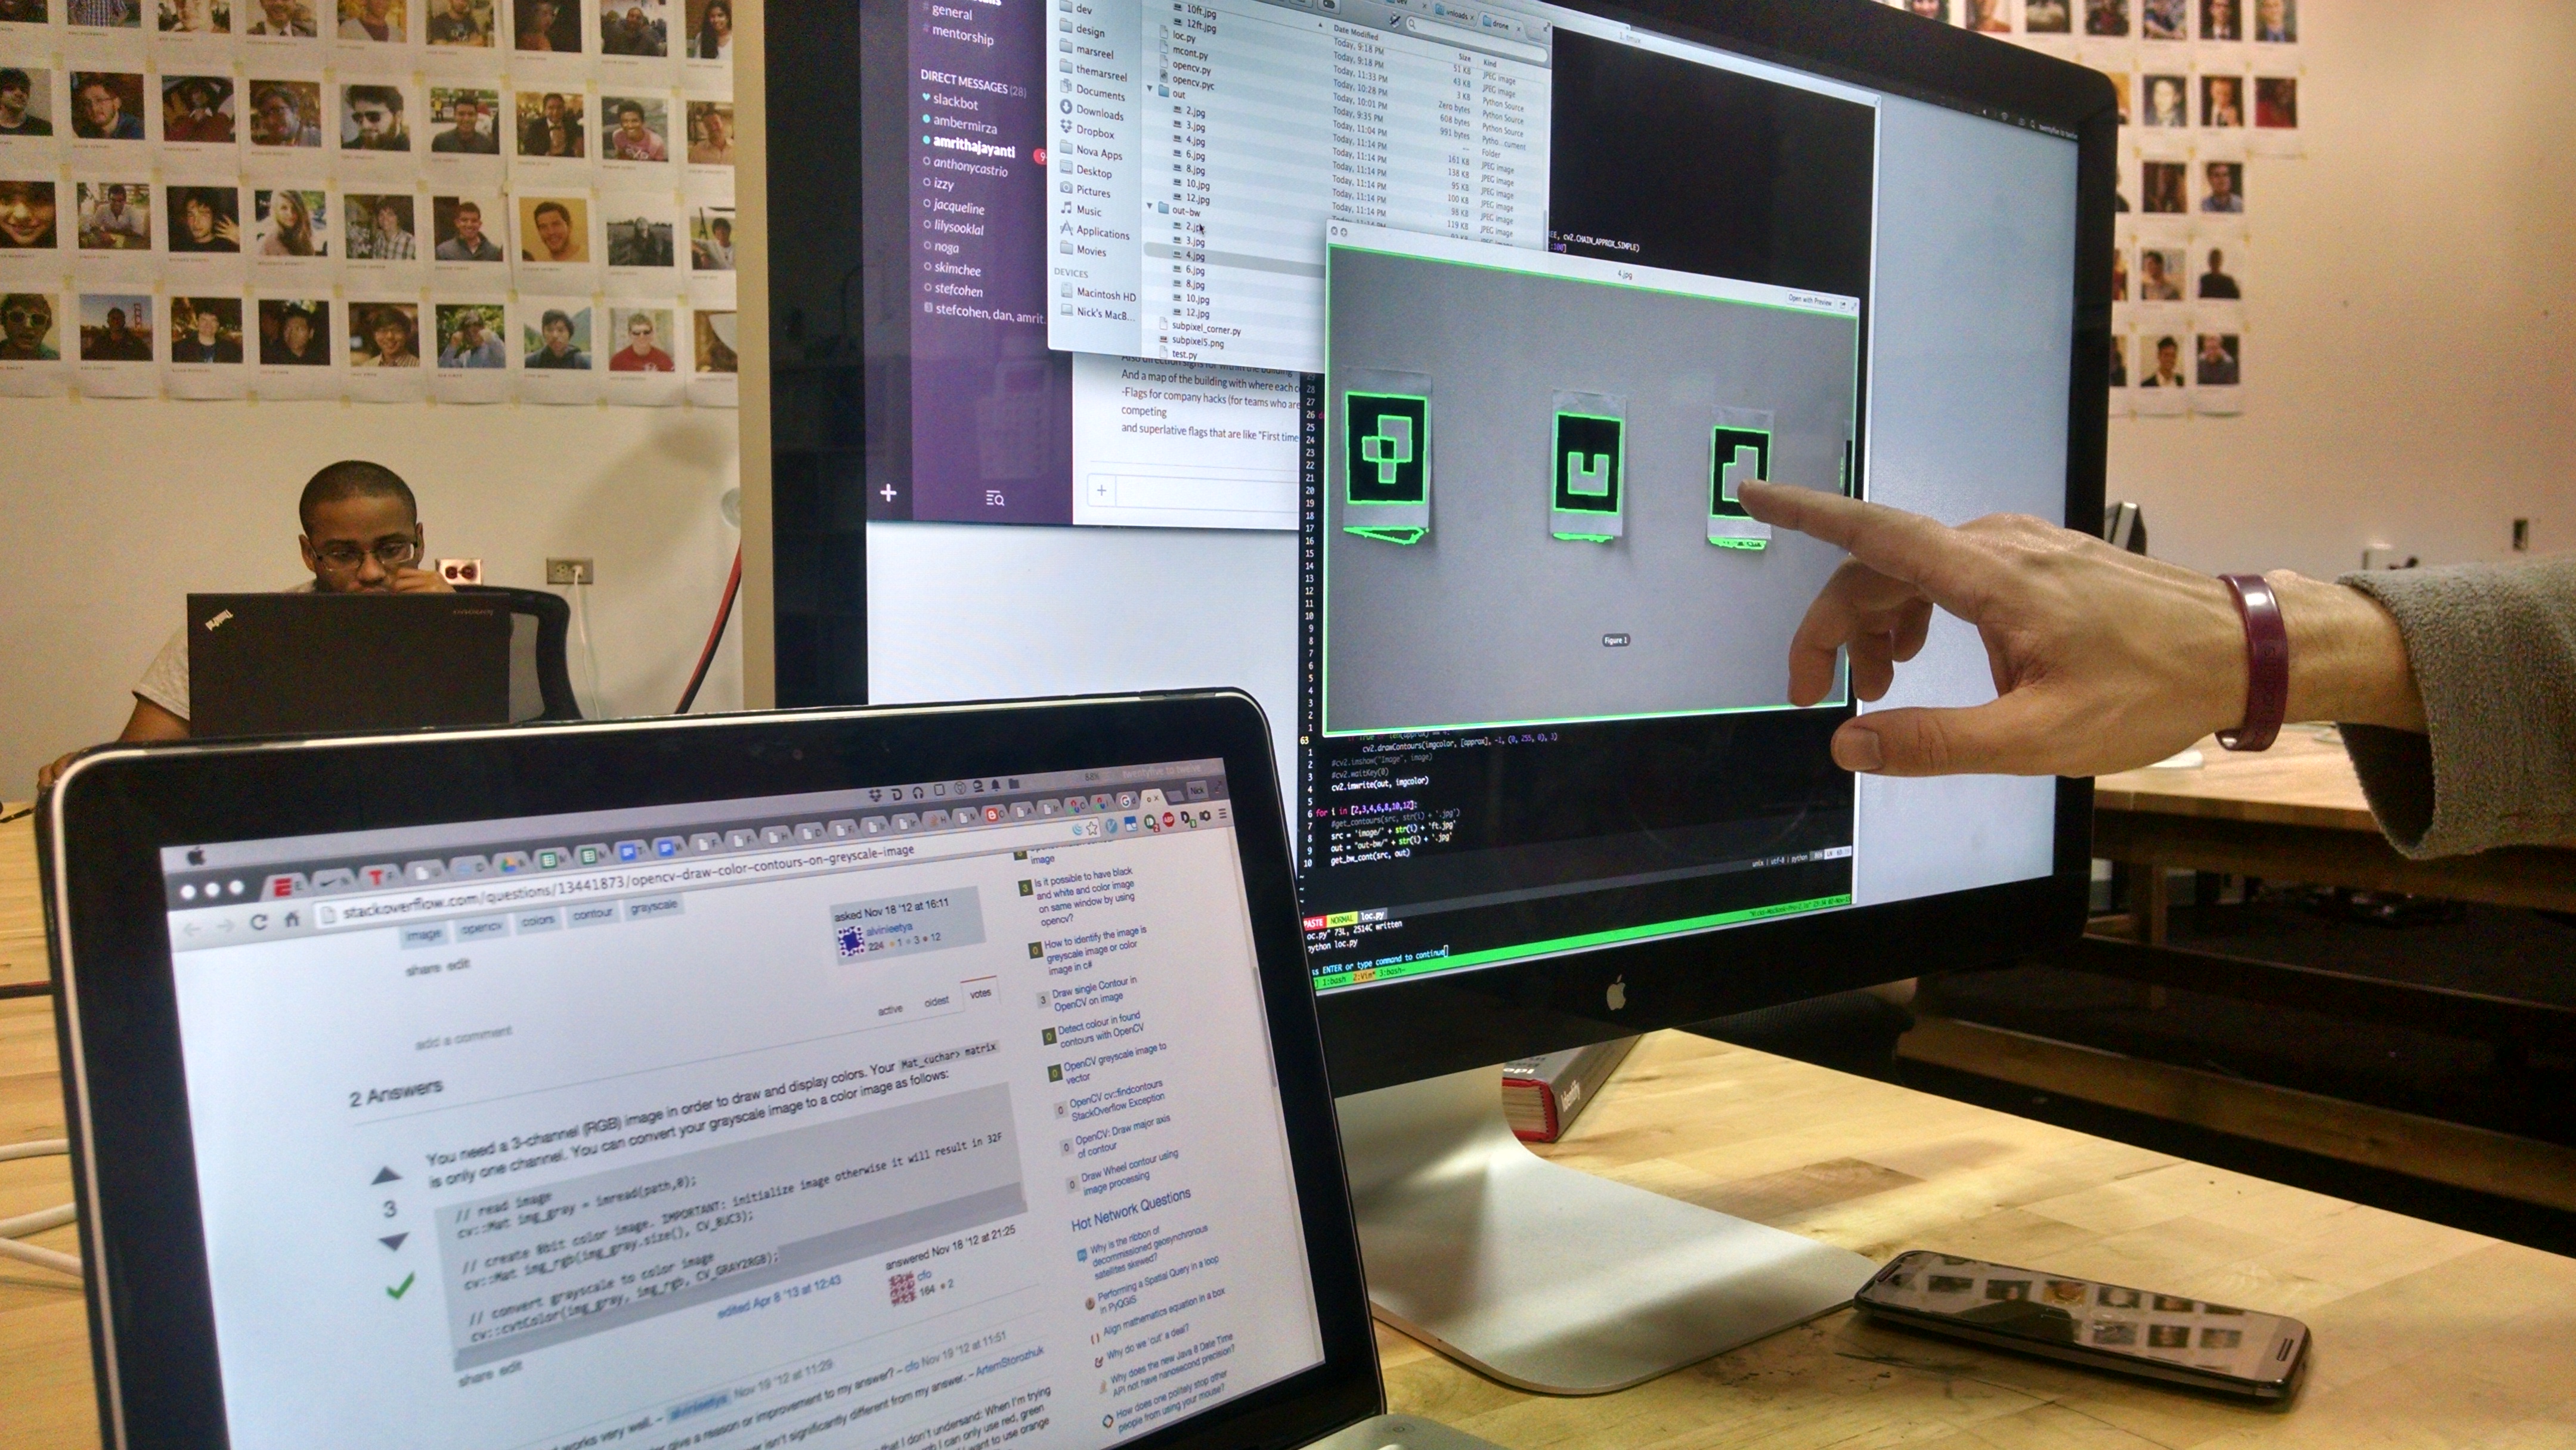
Here they are working to eliminate shadows between the papers and the wall from being detected by the program.
They were able to successfully locate the boundaries (green) and center (red) of each unique identifier.
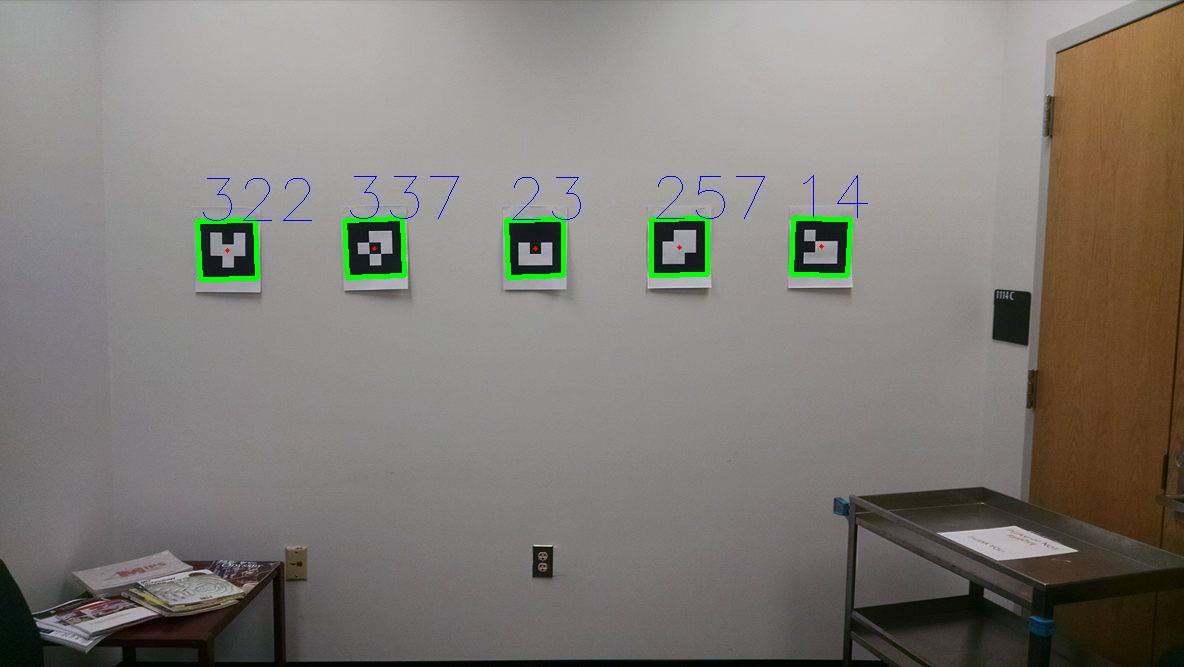
The blue numbers generated by the program identify each unique matrix. Each square has a value, 2x. X is an integer from 0 to 9 assigned by the program in order from the top left square to the bottom right. If the square is filled in, or black, the 2x value is multiplied by 1. If the square is not filled in, or white, the 2x value is multiplied by 0. The entire sequence of numbers are added together resulting in the blue number in the picture. For example, look at the last matrix on the right.
|
20 |
21 |
22 |
|
23 |
24 |
25 |
|
26 |
27 |
28 |
The squares that are filled in are as follows:
0×20 + 1×21 + 1×22 + 1×23 + 0×24 + 0×25 + 0×26 + 0×27 + 0×28 = 21 + 22 + 23 = 14
This is the basics of how all information is stored on your computer except, instead of QR-codes, computers use magnets! (Does anyone else think this is SO COOL?!)
T-3 Days until Technica
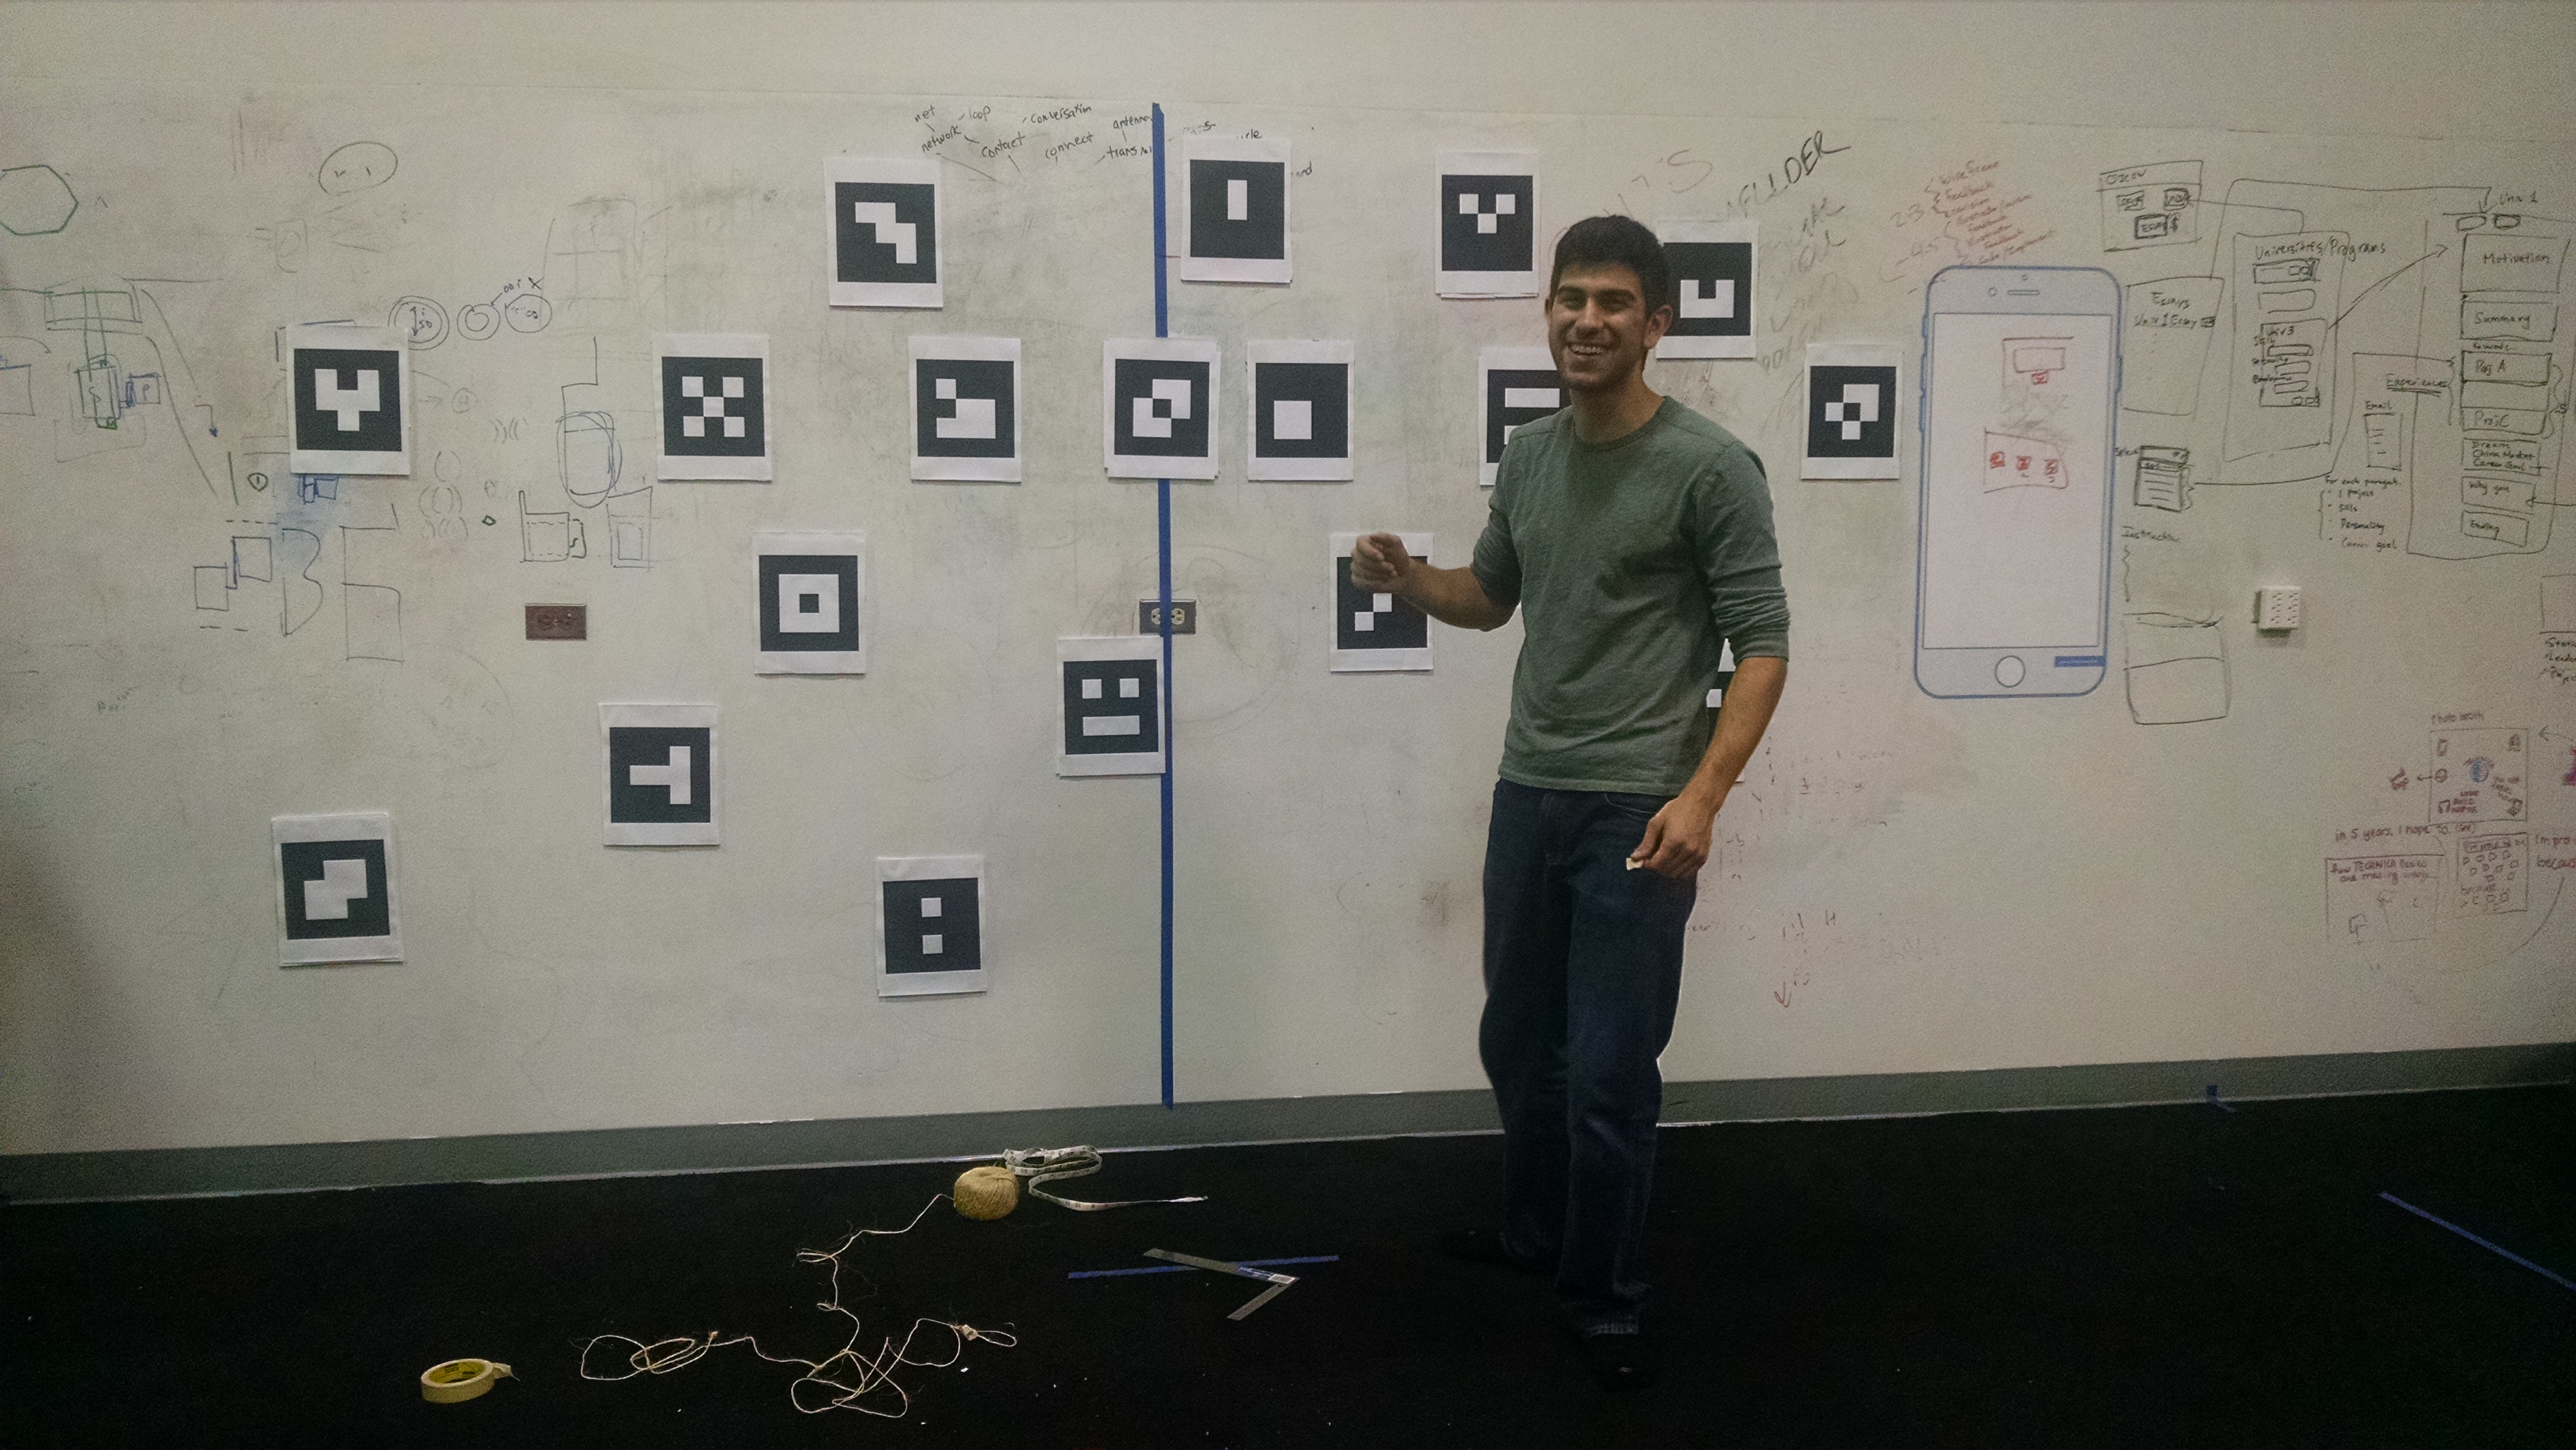
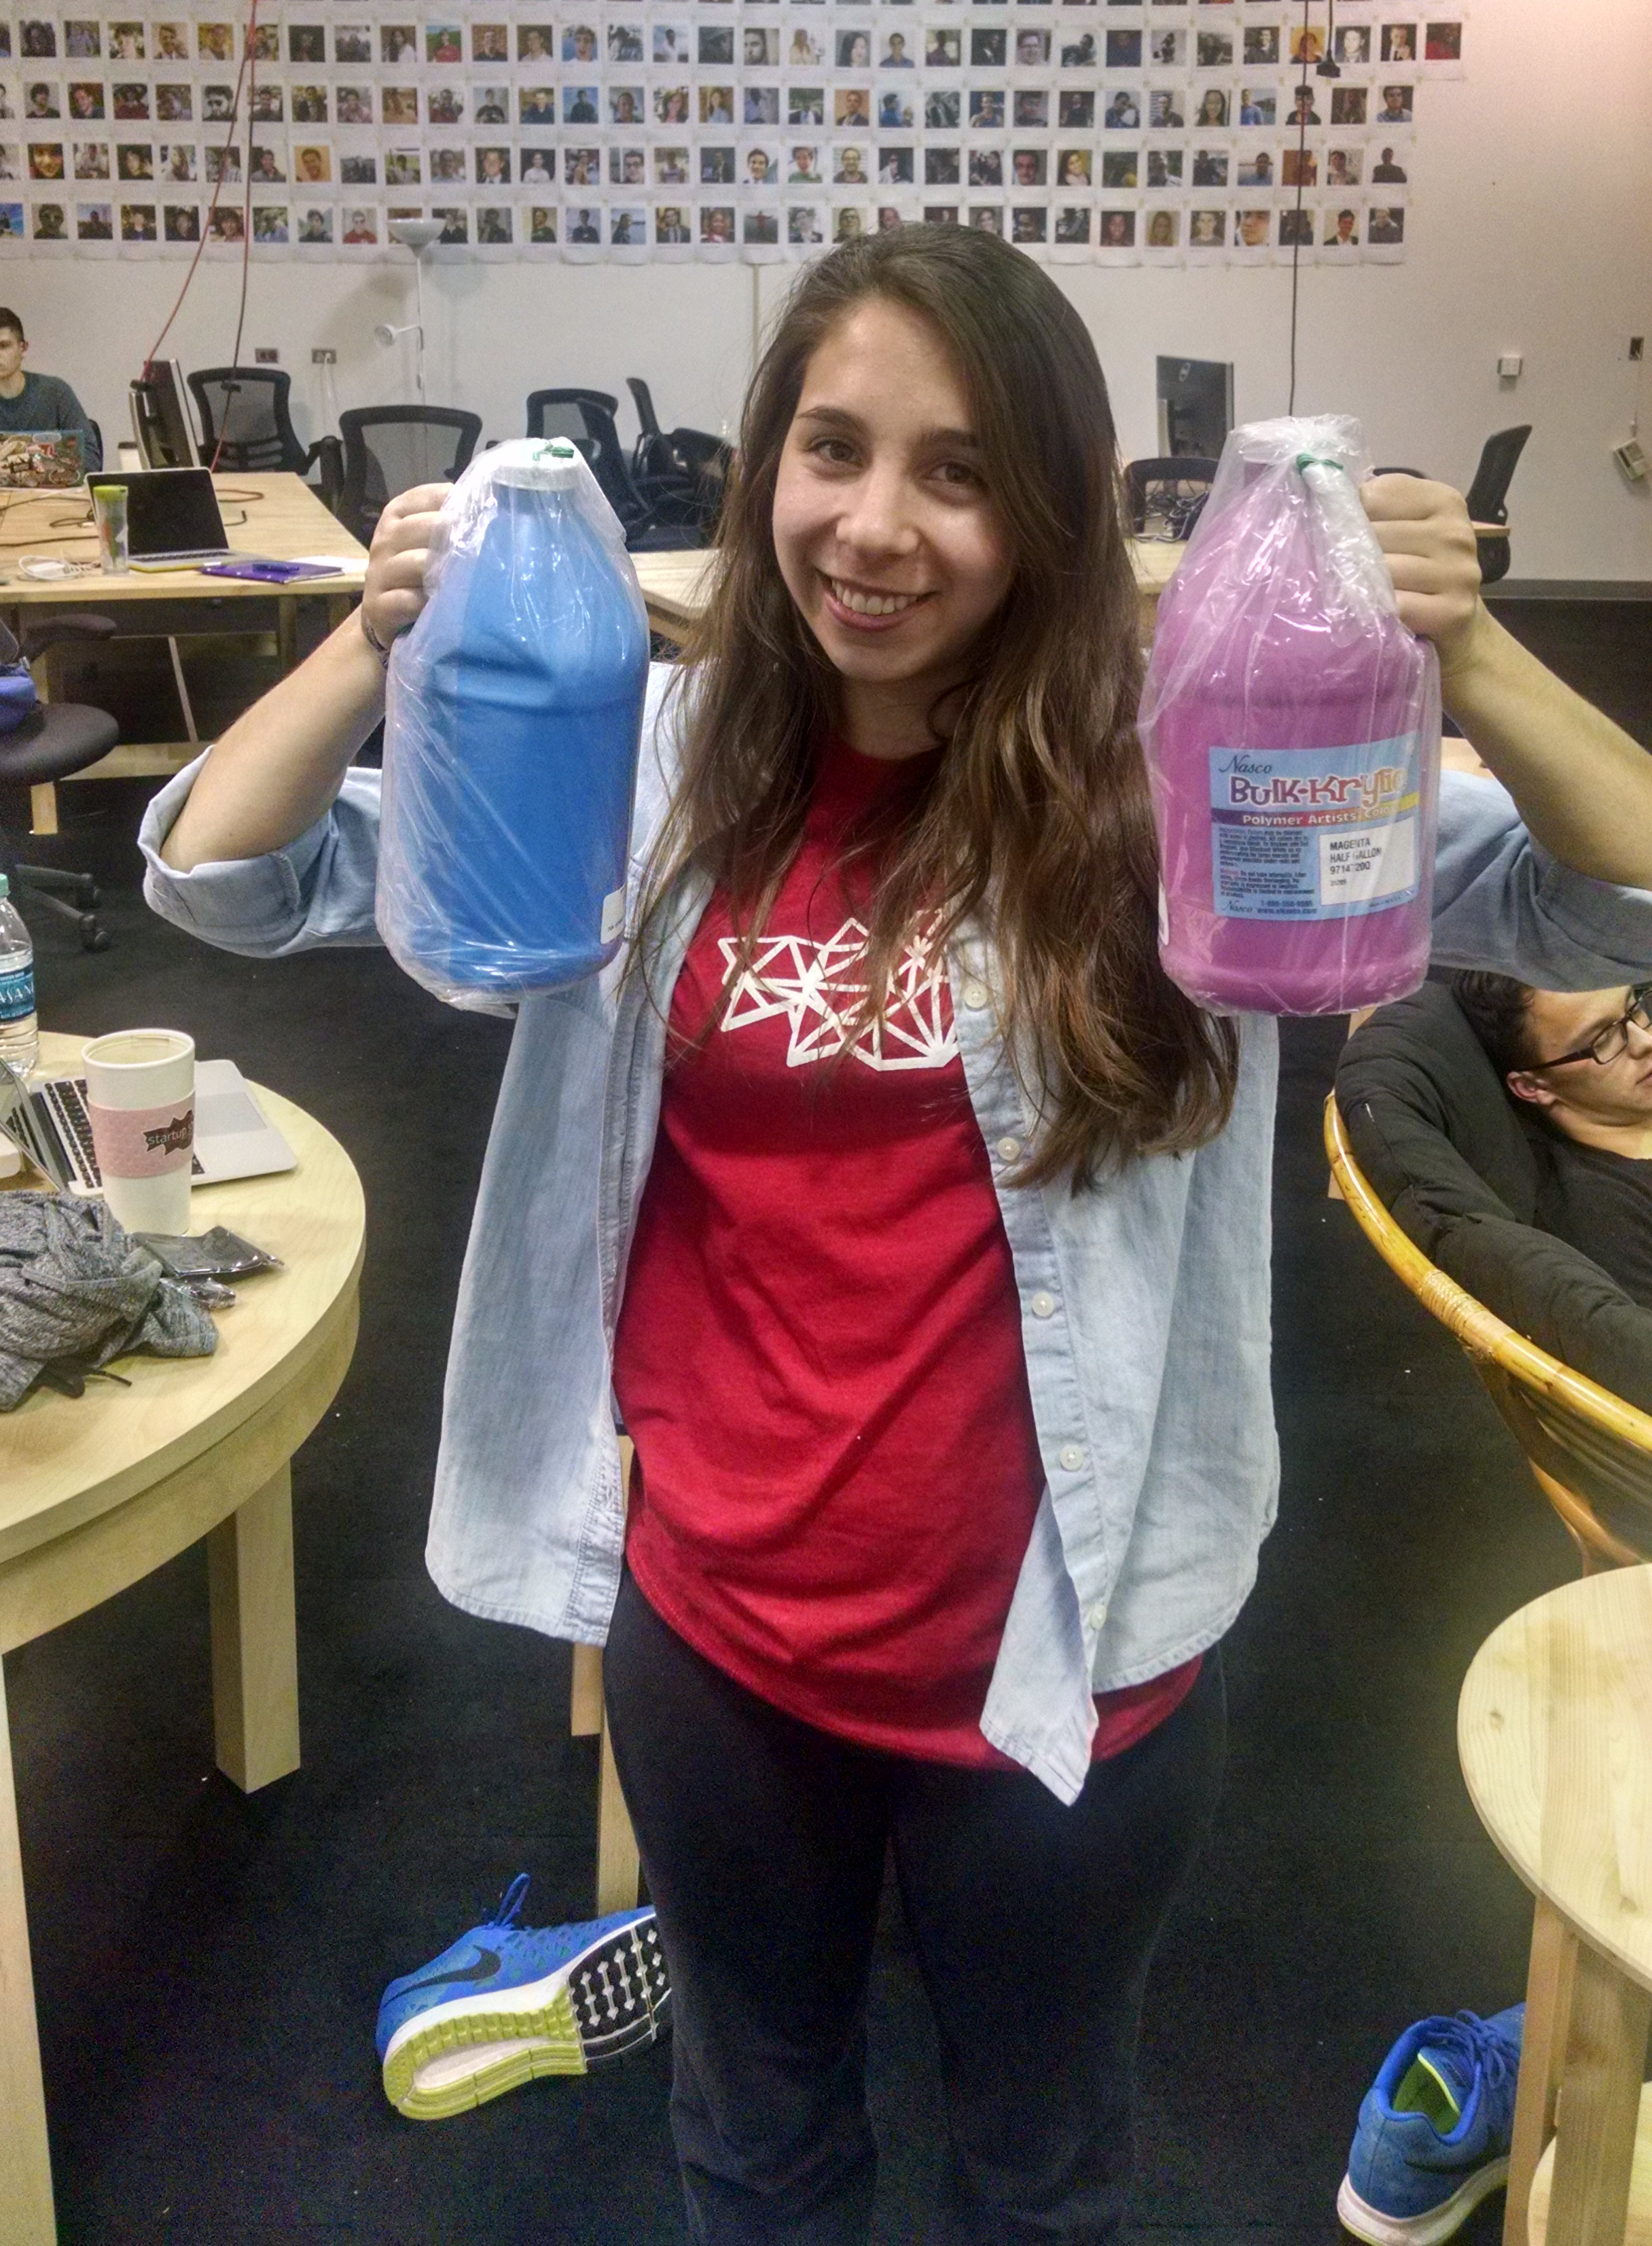
At this point, we were consuming more coffee than food! We then tried OpenCV on a Raspberry Pi and Pi camera which we intended to mount on the drone. By the end, our setup looked like this:
Josh and Nick worked with me to learn Python and even exposed me to some Vim, which was traumatic. (I still don’t understand how to backspace!) Nick was able to very accurately determine the position of the drone perpendicular from the wall, however the location parallel to the wall proved to be much more difficult knowing the drone would rotate during flight.
In one last attempt to gain some guidance for our predicament, we met with the Unmanned Aerial Vehicle team at UMD that night. They mentioned a member of their team who had spent a summer researching what we were attempting. They told us it would take a least a month’s worth of work to successfully complete, if we could even complete it.
What were we going to do? We only had two more working days until the event! Nick and I rushed to Startup Shell and, with whatever materials we could find, started fashioning a paint dropping mechanism.

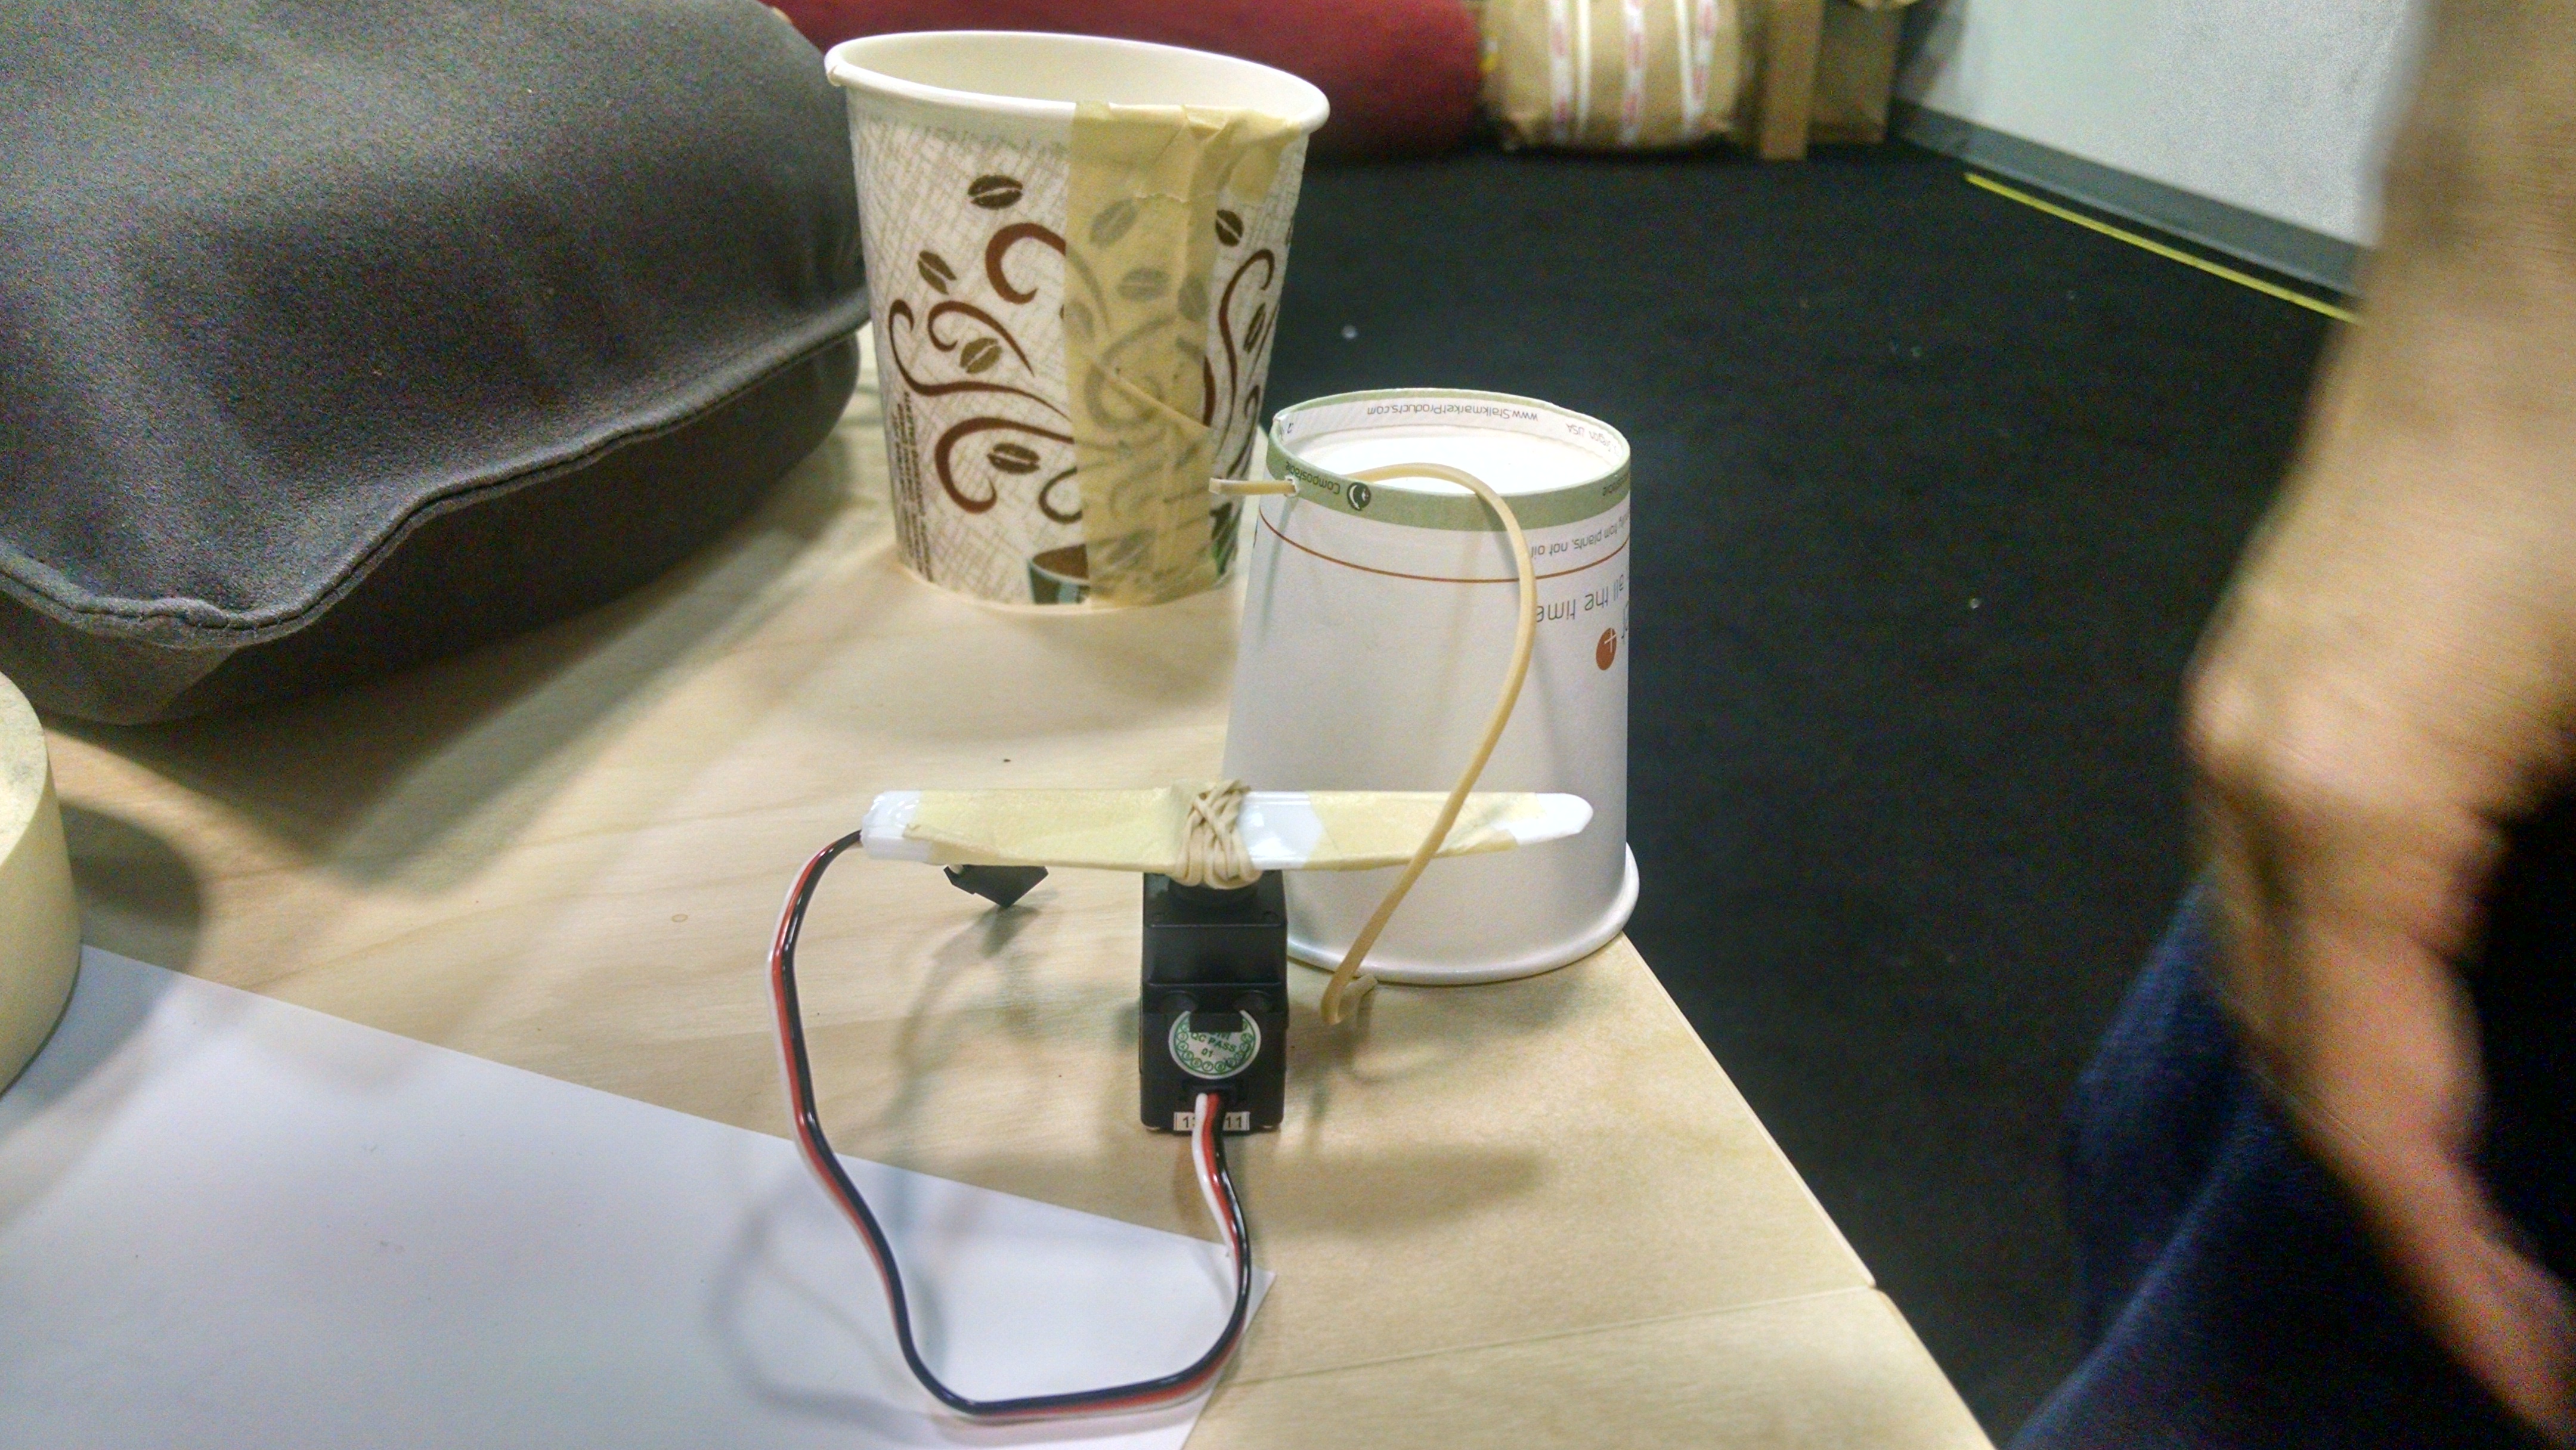
Seriously. ANYTHING we could find.
The dropping mechanism added the weight of a cup of paint, servo, and battery to the drone that we still did not have.
We needed a new plan, so around 5 AM we decided to review our options. We didn’t have a drone, we didn’t have precise control, and we didn’t have time. Originally, we had been offered a DJI Phantom; however, due to our proximity to Washington, DC, the GPS software had grounded the drone, even indoors. The Bitcamp team had AR Parrot drones, but those couldn’t hold the weight of the tracking system and dropping mechanism.
Nick suggested we play around with the AR Parrot drone anyways and see what we could come up with, since it was the only flying drone we could immediately access. I thought about the last time I had seen someone hack an AR Parrot drone. A team at Bitcamp had programmed an AR Parrot drone to flip every time a positive message was Tweeted at it.
That was it! Flip the drone, not the cup! By placing a 30g cup of paint on top of a parrot drone, we could splatter paint using a drone that was already programmed to flip, and remove the need for a servo mechanism.
At this point, we were keeping blankets at Startup Shell, which had become our temporary home. I watched the sunrise until the caffeine wore off, and went to sleep confident and reenergized to take on this project. We could do this!
T-2 Days until Technica
Nick picked up the AR Parrot drone in the morning from the Bitcamp team. It was super easy to control within our 15 by 10 foot boundary and great for hacking. We immediately recognized how convenient the built-in flip feature would be for our needs.
We taped a cup of water to the top of the drone, navigated it, and flipped it, leaving a beautiful and defined splatter pattern. Not to mention, the drone was left almost completely dry. This was really going to happen!
We finally felt confident to start the countdown and launch the website on social media. At this point it was all Shellers on deck to get this project done! We nixed the QR code tracking method and decided to use an outside-in tracking method with a wall-mounted webcam and a couple LEDs mounted to the drone. Nick worked on an OpenCV program to track a bright spot, specifically a green LED because the color contrasted the white canvas and blue and pink paint the best. It also prevented the program from mistaking any light spot in the room as the LEDs on the drone.
It was another late night, however it felt like more progress was made in that day than the entire week. It was thrilling.
T-1 Days until Technica
It was our final push. This was the last full working day before Technica, as almost every Startup Shell member was signed up to mentor hackers.
I worked on programming a couple emergency keyboard commands to manually control the drone if anything unexpected were to happen. We were yelling “abort!” or “land!” often, so these came in handy. Ishaan Parikh mentioned that he had wanted to learn Node.JS and signed up for a hackathon that weekend to learn it. Well, the drone needed to be controlled with Node.JS, and we needed man power.
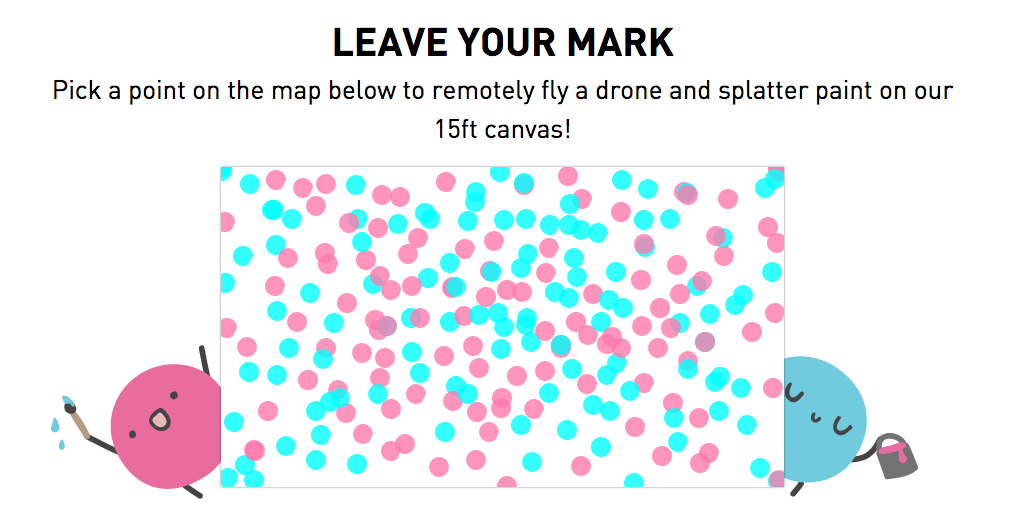
So, instead he skipped the hackathon and even pulled an all-nighter with us! Ishaan wrote a program that used the drone’s internal camera to lift off to a specified altitude, then move from the current location determined by the OpenCV program to the coordinates logged on the html canvas. With each movement, the drone would pause, determine it’s current location relative to the target location, then move. Once it made it to the target it would climb to a higher altitude, flip, then land for a paint refill. Somehow, it finally came together!
T-0 Days until Technica
I cannot describe the feeling of seeing the first paint splatter on the day of the event; especially because we never tested with paint prior. The parrot drone only had a 15-minute battery life, so we had to work quickly, and be observant of the first sign of low battery life to replace it with one of our 7 batteries. Despite that, it worked great and for the most part, stayed within the bounds of the canvas. If the drone ever went out of control, which sometimes it did, Ishaan was ready with a manual abort shortcut to land the drone.
Here is an awesome video that Nick put together of the event:
By the end, the HTML canvas looked like this:
And the painting looked like this:
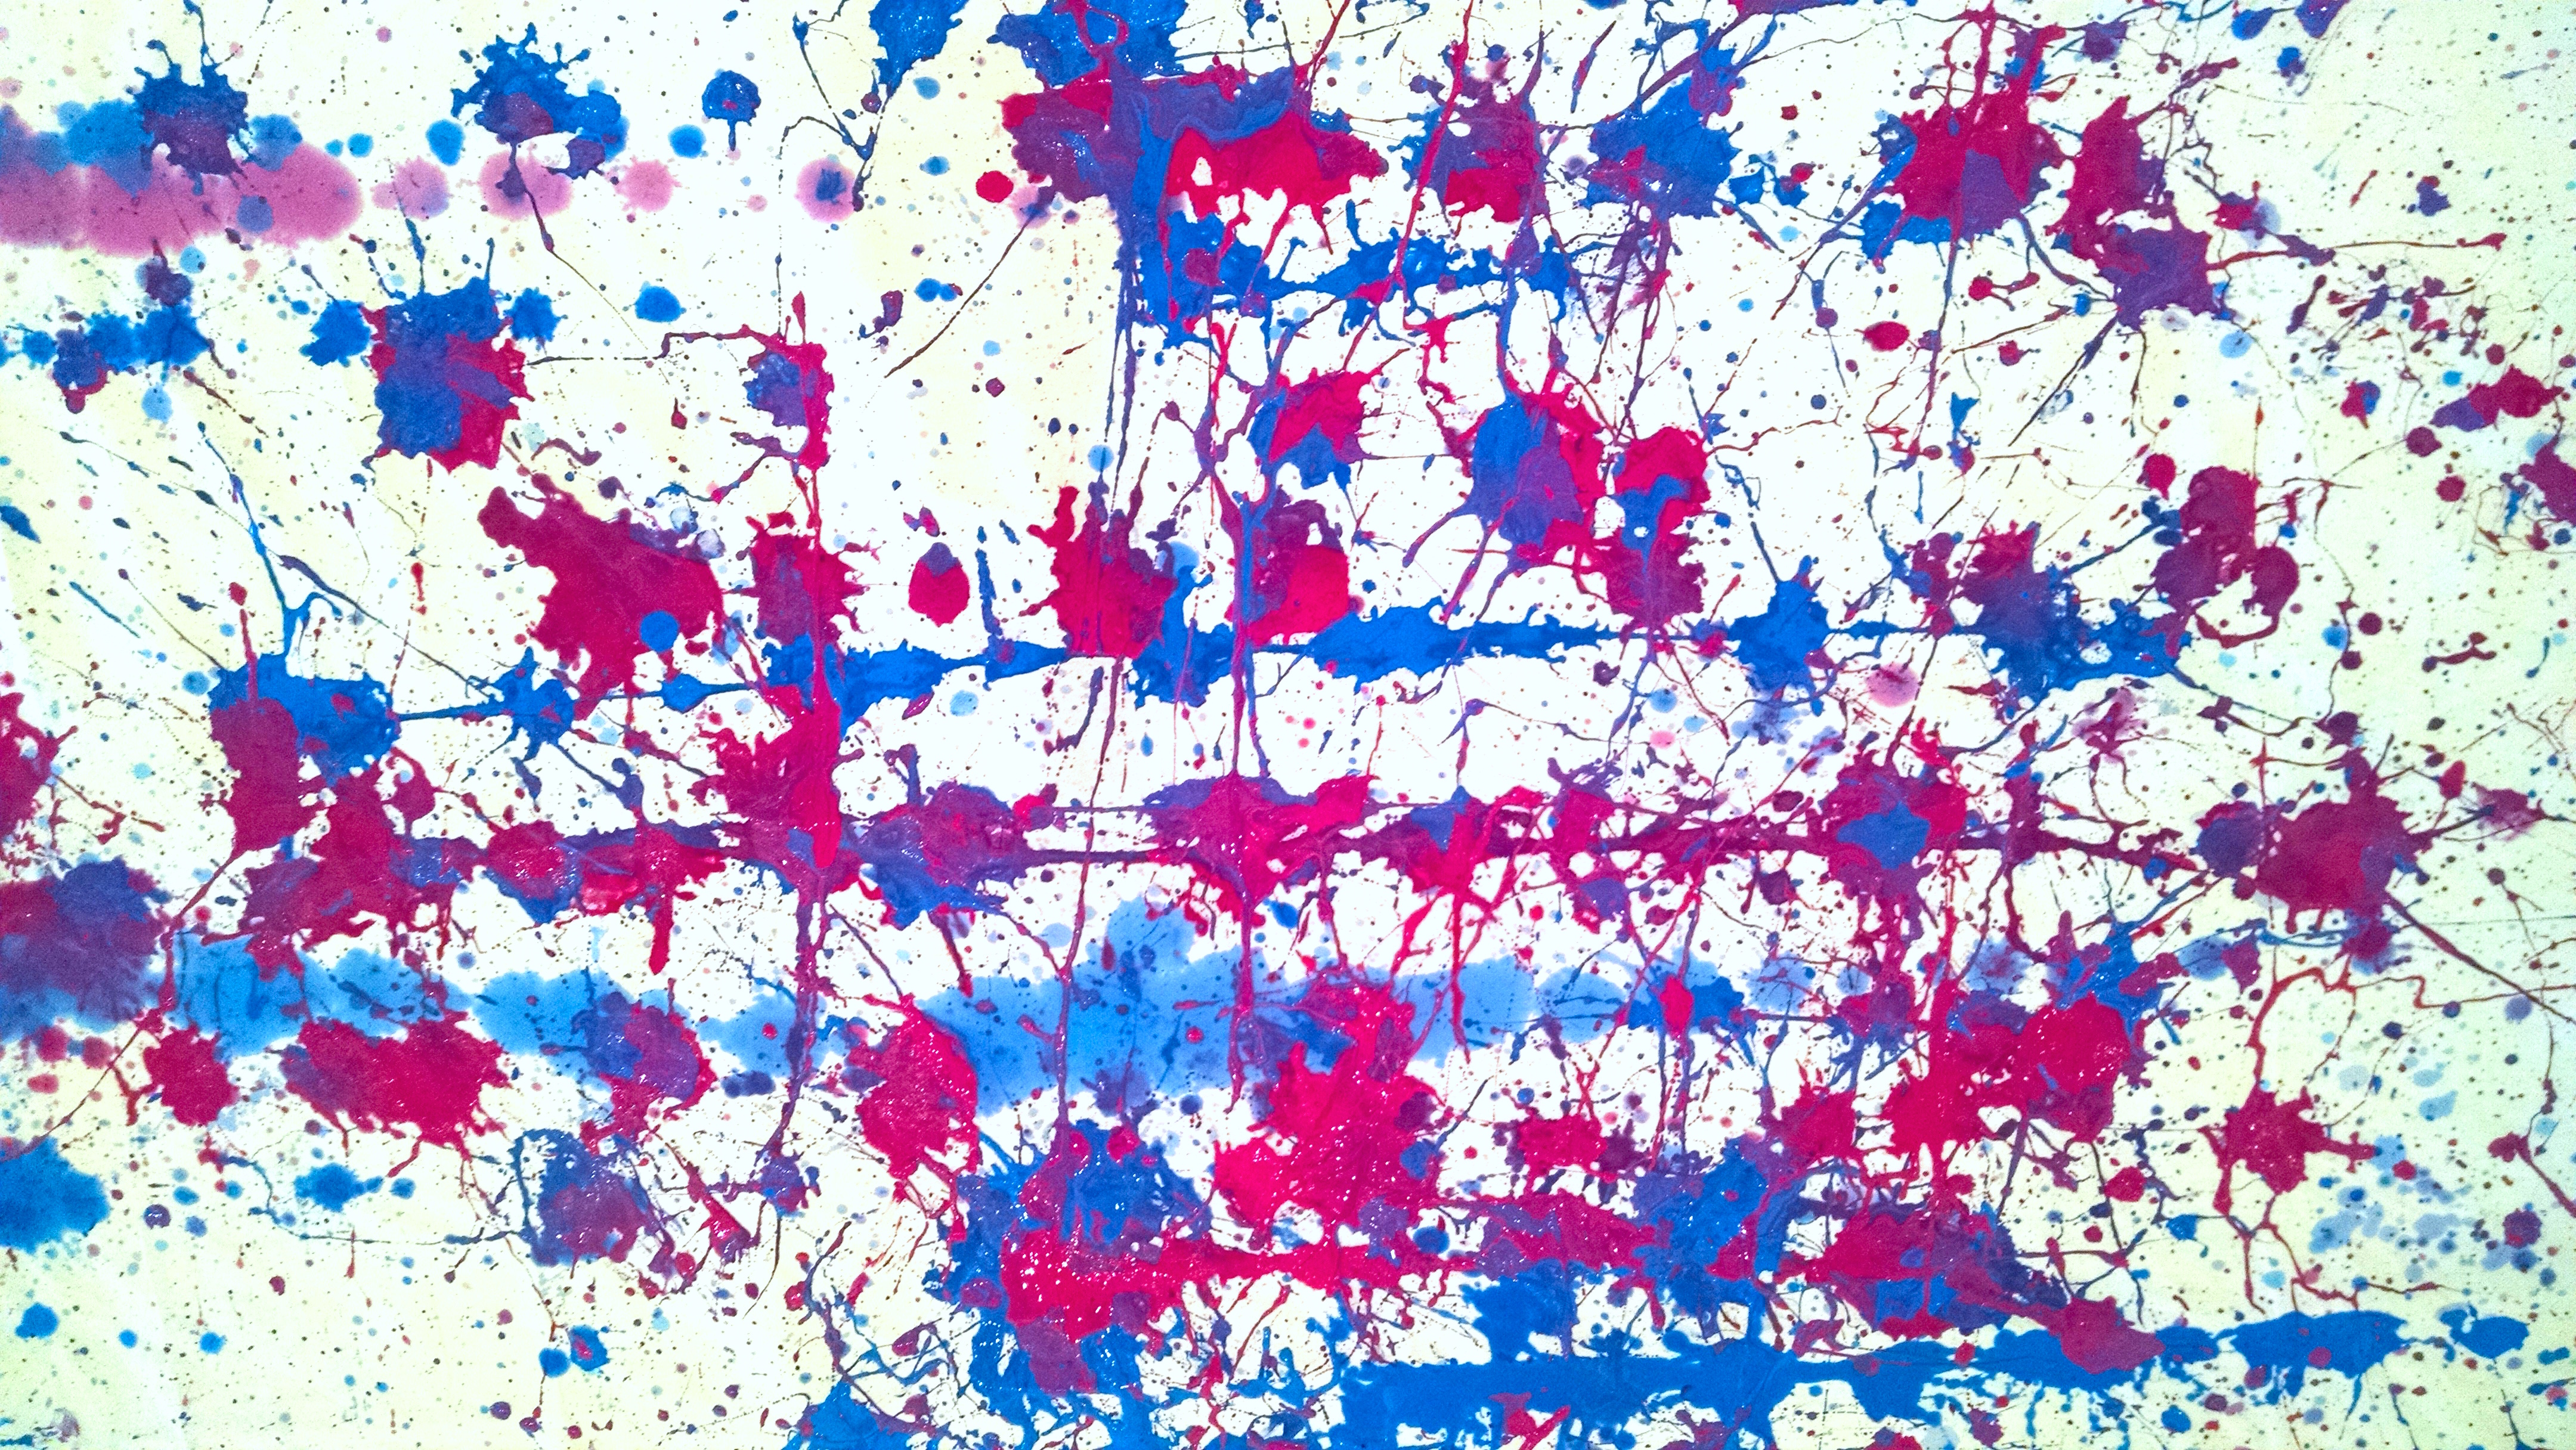
The most rewarding part of this entire project was the beautiful painting created by the participation of almost 200 strangers from around the world! To see the participants (excluding profane entries – not cool, people) and where they are from, click here!
I went through a pretty heavy withdrawal after the event. After working with HTML, CSS, JavaScript, Ruby (Sinatra and DataMapper), Unix commands, and Git all for the first time, I found it very difficult to go back to focusing on school, and as a result, didn’t do school work for about a month (I’m sure many of you can relate to the feeling). Despite that, this was one of my favorite art hacks to-date for its collaborative development and result. That’s one of the awesome things about tech. It enables us work together no matter where we live to produce something amazing.
View project here: drone.gotechnica.org
Thanks to:
Josh and Patrice for all of the work you put into building a drone and for helping out at the event.
Shariq, Josh, and Nitay for working on the OpenCV tracking, and Carson for helping with camera rigging.
Anthony and the Bitcamp team for offering the parrot drone and letting us get paint on it.
Amritha, Michael, and the Technica team, for making this happen.
Jeff and the Hive2.0 Honfleur Gallery for housing the project and letting us leave paint on the ceiling. Also to Startup Shell for letting the project take over the space and make it our home for the week.